Customers
Viewing, Adding, and Editing Customers
The Customers section in CommerceHub provides a centralized interface to view, manage, and maintain all customer accounts. It supports detailed list views (e.g., all customers, members, subscribers), bulk operations like import/export, and advanced search and filter capabilities. Administrators can access complete customer profiles, including contact info, membership status, GDPR consent, registration source, and company association. This module streamlines customer data handling for efficient account management across web, mobile, store, and third-party channels.

Field and their descriptions on the customer details page
1. Overview Tab
Customer Information Fields
| Field Name | Description |
|---|---|
| Customer ID | Unique system-generated identifier for the customer |
| Primary email address used for account login and communications | |
| First Name | Customer's given name |
| Last Name | Customer's family name |
| Phone | Primary contact number & Telephone Number |
| Newsletter | Indicates if customer is subscribed to marketing emails (Yes/No) |
| Registered | Shows if customer has completed registration (Yes/No) |
| Group | Customer's assigned membership group (e.g., NewCustomers, Members) |
Order Statistics
| Field Name | Description |
|---|---|
| LTV (Life Time Value) | Total value of all customer orders to date |
| Total Orders | Number of orders placed by customer |
| AOV (Average Order Value) | Average value of customer's orders |
| LOV (Lowest Order Value) | Value of customer's smallest order |
| HOV (Highest Order Value) | Value of customer's largest order |
| Returns | Total value of customer's returned orders |
Sessions
| Field Name | Description |
|---|---|
| Page Views | Total number of pages viewed by the customer across the site. - Search: Number of times the customer used the site’s search functionality - Collection: Collection pages viewed by the customer Views - Product Views: Number of product detail pages viewed. |
| Added to Bag | Number of times added a product to the bag/basket. |
| Units Sold (All Channels) | Total quantity of products purchased by the customer across all sales channels. |
Activity Metrics
| Field Name | Description |
|---|---|
| Total Visits | Number of times customer has visited the store |
| Converted Visits | Number of visits that resulted in purchases |
| First Visit | Date of customer's first store visit |
| Last Visit | Date of customer's most recent store visit |
| First Ordered | Date of customer's first purchase |
| Last Ordered | Date of customer's most recent purchase |
Channel Information
| Field Name | Description |
|---|---|
| Web | Number of orders placed through website |
| Mobile | Number of orders placed through mobile app |
| Phone | Number of orders placed via telephone |
| Store | Number of in-store purchases |
Marketing Data
| Field Name | Description |
|---|---|
| Direct | Orders from direct traffic |
| Organic | Orders from organic search |
| Orders from email campaigns | |
| Social | Orders from social media |
| PPC | Orders from paid advertising |

2. Orders & Returns
Complete history of customer orders and any associated returns.
Order History
| Field Name | Description |
|---|---|
| Order Number | Unique identifier assigned to the customer’s order. |
| PO# | Purchase order number provided by the customer, if applicable. |
| Ship To | Customer Name in the shipping address for the order's delivery. |
| Date | The date when the order was placed. |
| Channel | The source or platform from which the order was placed (e.g., Web, Mobile, Store). |
| Status | Current state of the order (e.g., Approved, Delivered, Cancelled, etc.). |
| Amount | Total value of the order, including taxes and discounts. |
Return History
| Field Name | Description |
|---|---|
| Return Number | Unique identifier assigned to the customer’s return order/RMA. |
| Date | The date when the return was requested. |
| Status | Current status of the return (ReturnRequested, Return Approved. Return Rejected, etc.) |
| Amount | Total value of the RMA/Return Order. |

3. Quotes
Price quotes requested or received by the customer.
| Field Name | Description |
|---|---|
| Quote # | Unique identifier assigned to quote created. |
| RFQNo # | Unique identifier assigned to Request for Quote created. |
| PO # | Purchase order number cretaed against the quote , if applicable. |
| User | Name of the user who created/requested the quote |
| Type | Created by Admin (👻) or User (Blank) |
| Valid Until | The date till when the quote remains active. |
| Created | The date when the quotes was created. |
| Status | Current status of the Quote( QuoteSent, Converted, etc.) |
| Total | Total value of the quote. |

4. Baskets
Saved shopping baskets, both active and abandoned.
| Field Name | Description |
|---|---|
| Created Date | The date when the basket was created. |
| IPAddress | IP address of the network from where the basket was created |
| Status | Current status of the basket (Active) |
| Attachment | Additional file associated with the basket or specific items in it |
| Value | Total value of the basket. |
| Action | Clickable Eye icon to view basket items. |

5. Login History
Record of customer login attempts and access times.
| Field Name | Description |
|---|---|
| Login System IP | IP address used during the customer's login session. |
| System Name | Name of the device or browser environment used to log in. |
| Login Date | Date and time when the login occurred. |

6. Email History
Log of transactional emails sent to the customer.
| Field Name | Description |
|---|---|
| From | The sender or system module that triggered the email. |
| Subject | The subject line of the email sent to the customer. |
| Sent Status | Indicates whether the email was successfully delivered. |
| Created | Date and time when the email was generated. |
| Detail (👁️ Eye Icon) | Clickable icon to preview the full email content sent to the customer. |

7. Address
List of saved billing and shipping addresses.
| Field Name | Description |
|---|---|
| Address | Full saved address including street, city, state, and postal code |
| Phone | Contact number associated specifically with that address |
| Default Billing Address | Indicates if this address is set as the default for billing (Yes/No) or to set as Default Billing Address |
| Default Shipping Address | Indicates if this address is set as the default for shipping (Yes/No) or to set as Default Shipping Address |

8. Wishlist
Products the customer has marked for future interest.

9. Reviews
Product reviews submitted by the customer.
| Field Name | Description |
|---|---|
| Product Name | Product name against the review submitted by customer |
| Rating | 1-5 Stars |
| Comment | Comment submitted in the review by customer. |

10. Notes
Internal notes added by staff related to the customer.
| Field Name | Description |
|---|---|
| Note | Internal comment or remark related to the customer |
| Action Required | Indicates if follow-up or specific action is needed |
| Created | Timestamp when the note was added |
| CreatedBy | Name or ID of the user who added the note |

11. Survey Response
Feedback submitted by the customer via surveys.

12. GDPR
Preferences: Customer's data consent and privacy preferences.
| Field Name | Description |
|---|---|
| Check box to show email consent is enabled or disabled | |
| SMS | Check box to show SMS consent is enabled or disabled |
| POST | Check box to show POST consent is enabled or disabled |
| Check box to show Whatsapp consent is enabled or disabled | |
| No Thanks | Check box to show if customer has disabled all |
| History | - Created: Date of Updating - IP Address: IP address from where the changes made - Email: Opted in or out - SMS: Opted in or out - POST: Opted in or out - Process: Action Optedin/OptedOut |

13. NPS
NPS History: Net Promoter Score responses provided by the customer.
| Field Name | Description |
|---|---|
| Entity | Can be either Order, Site, Page URL, Product |
| Score | Rating submitted by customer |
| Comment | Comment shared by customer |
| Created | Date of submitting the NPS |

14. Contact Us
Email History:: Communication received via the Contact Us form.
| Field Name | Description |
|---|---|
| From | Email address where the request was sent |
| Delivery ETA | Subject line for the request |
| PhoneNo | Contact Number provided while submitting request. |
| Created | Date of creation |
| Detail | Clickable eye icon to view the details shared by customer |

15. Register Interest
List of Products the customer has shown interest in.

16. Trade-In Quotes
Quotes requested by the customer for trading in items.
How to Create a New Customer
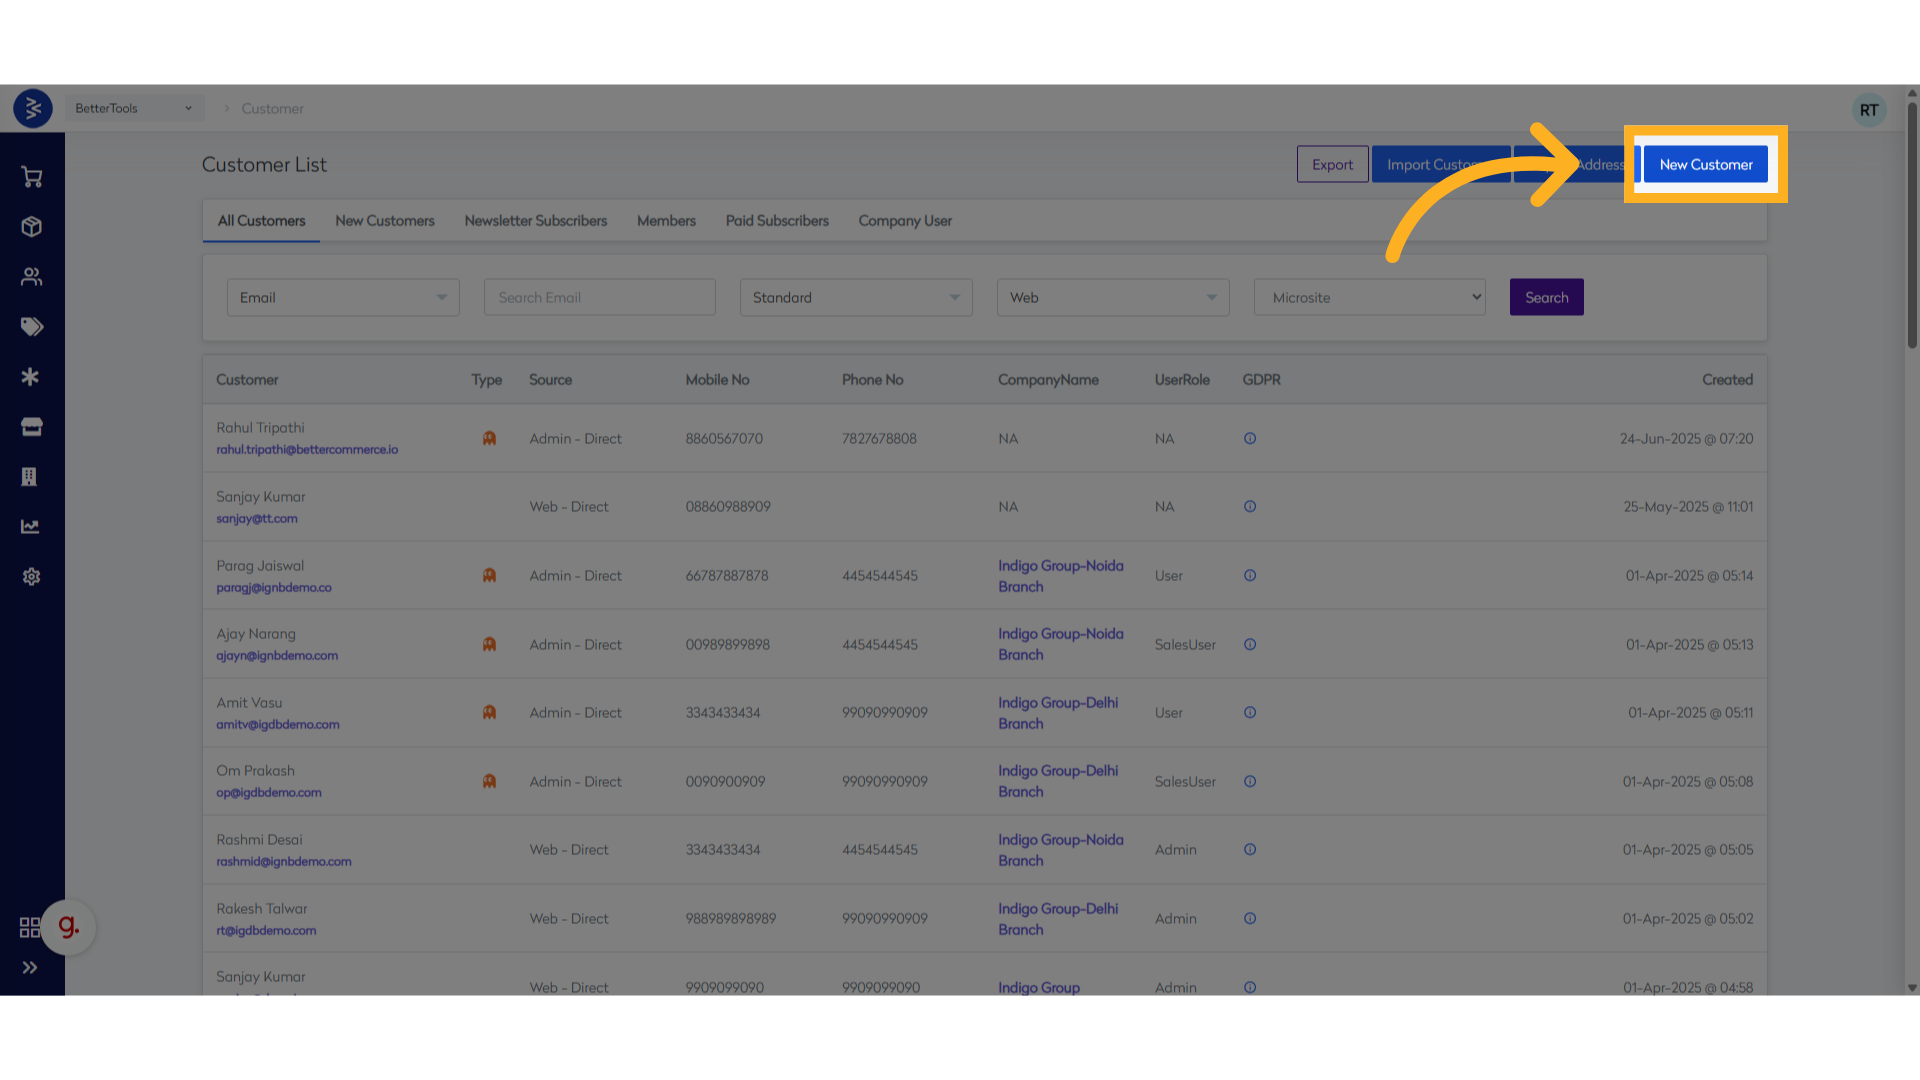
Method 1: From Customer List
- Navigate to
Customers>Viewfor customers listing page - Click "New Customer" button in top right corner
Method 2: Quick Access
- Use top navigation menu
- Select
Customers > Add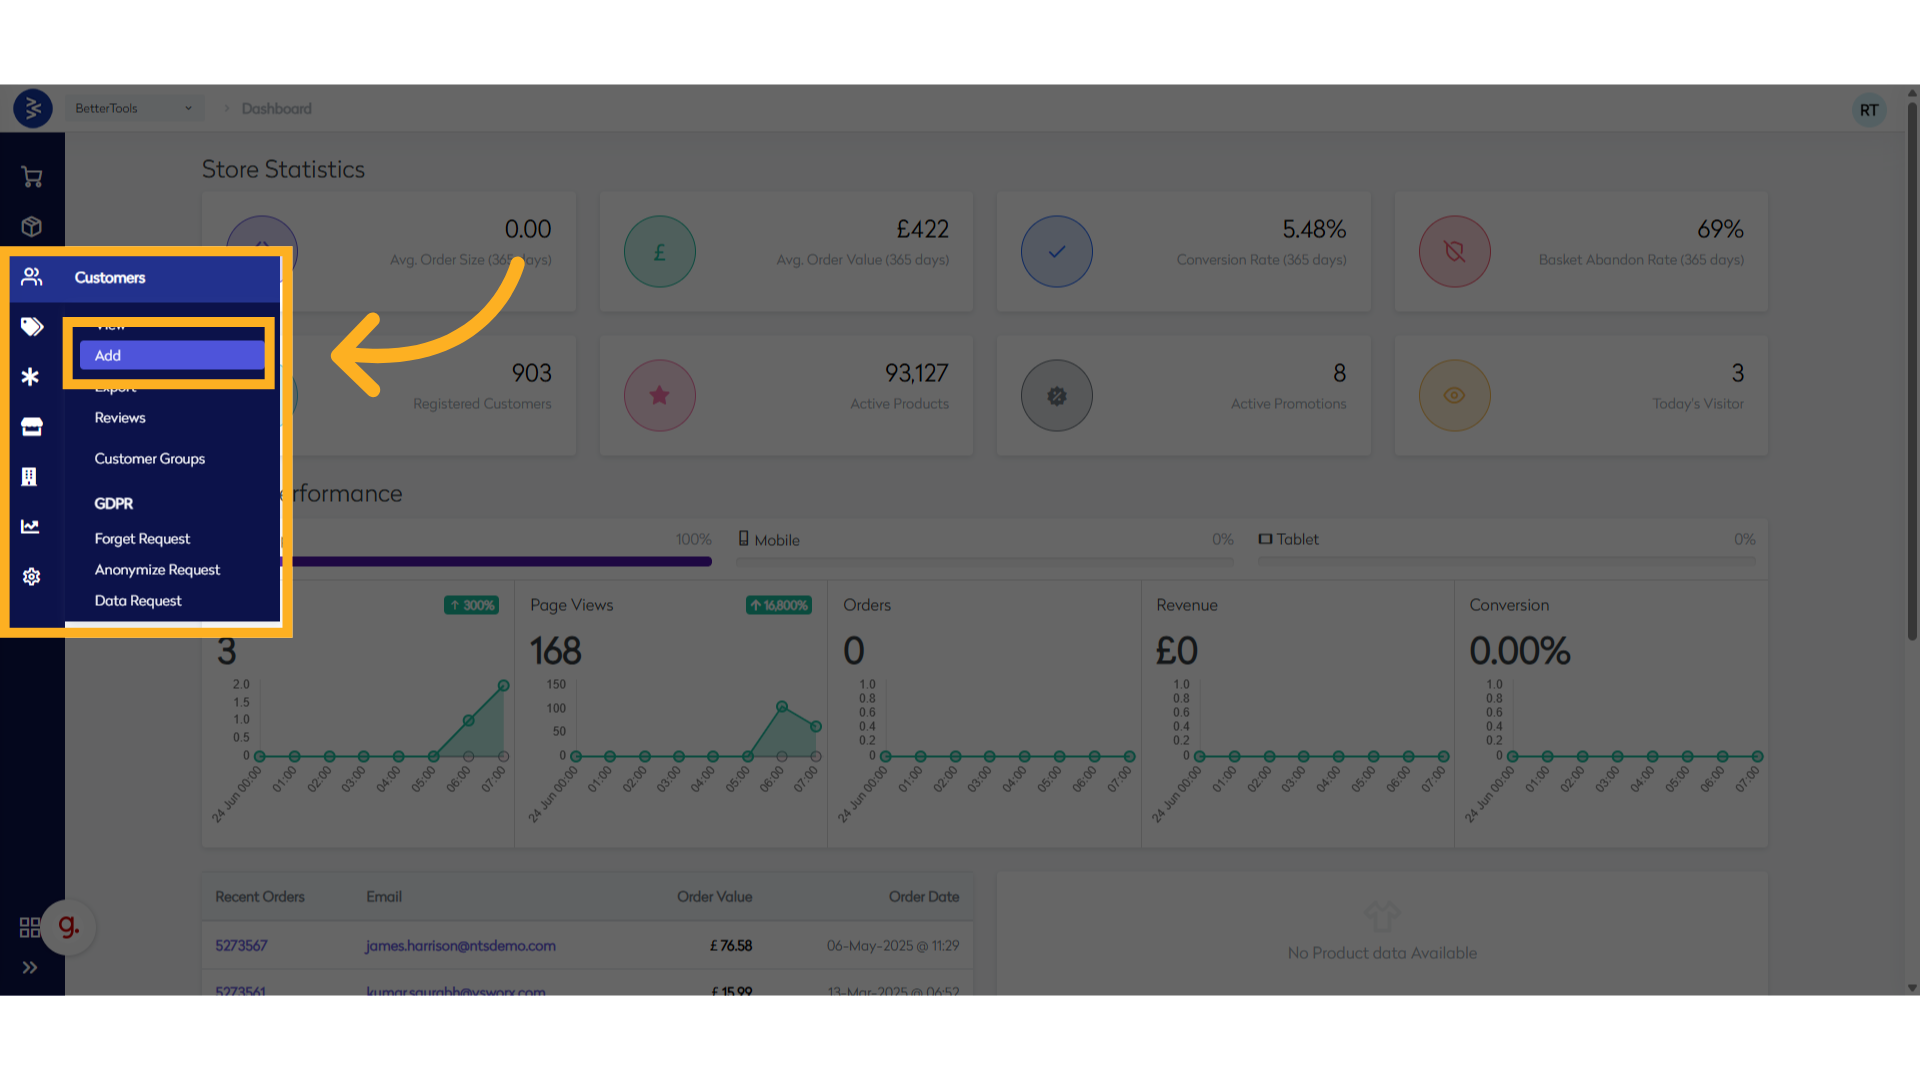
Follow the steps below to create a new customer:
-
Fill in the required Basic Information fields:
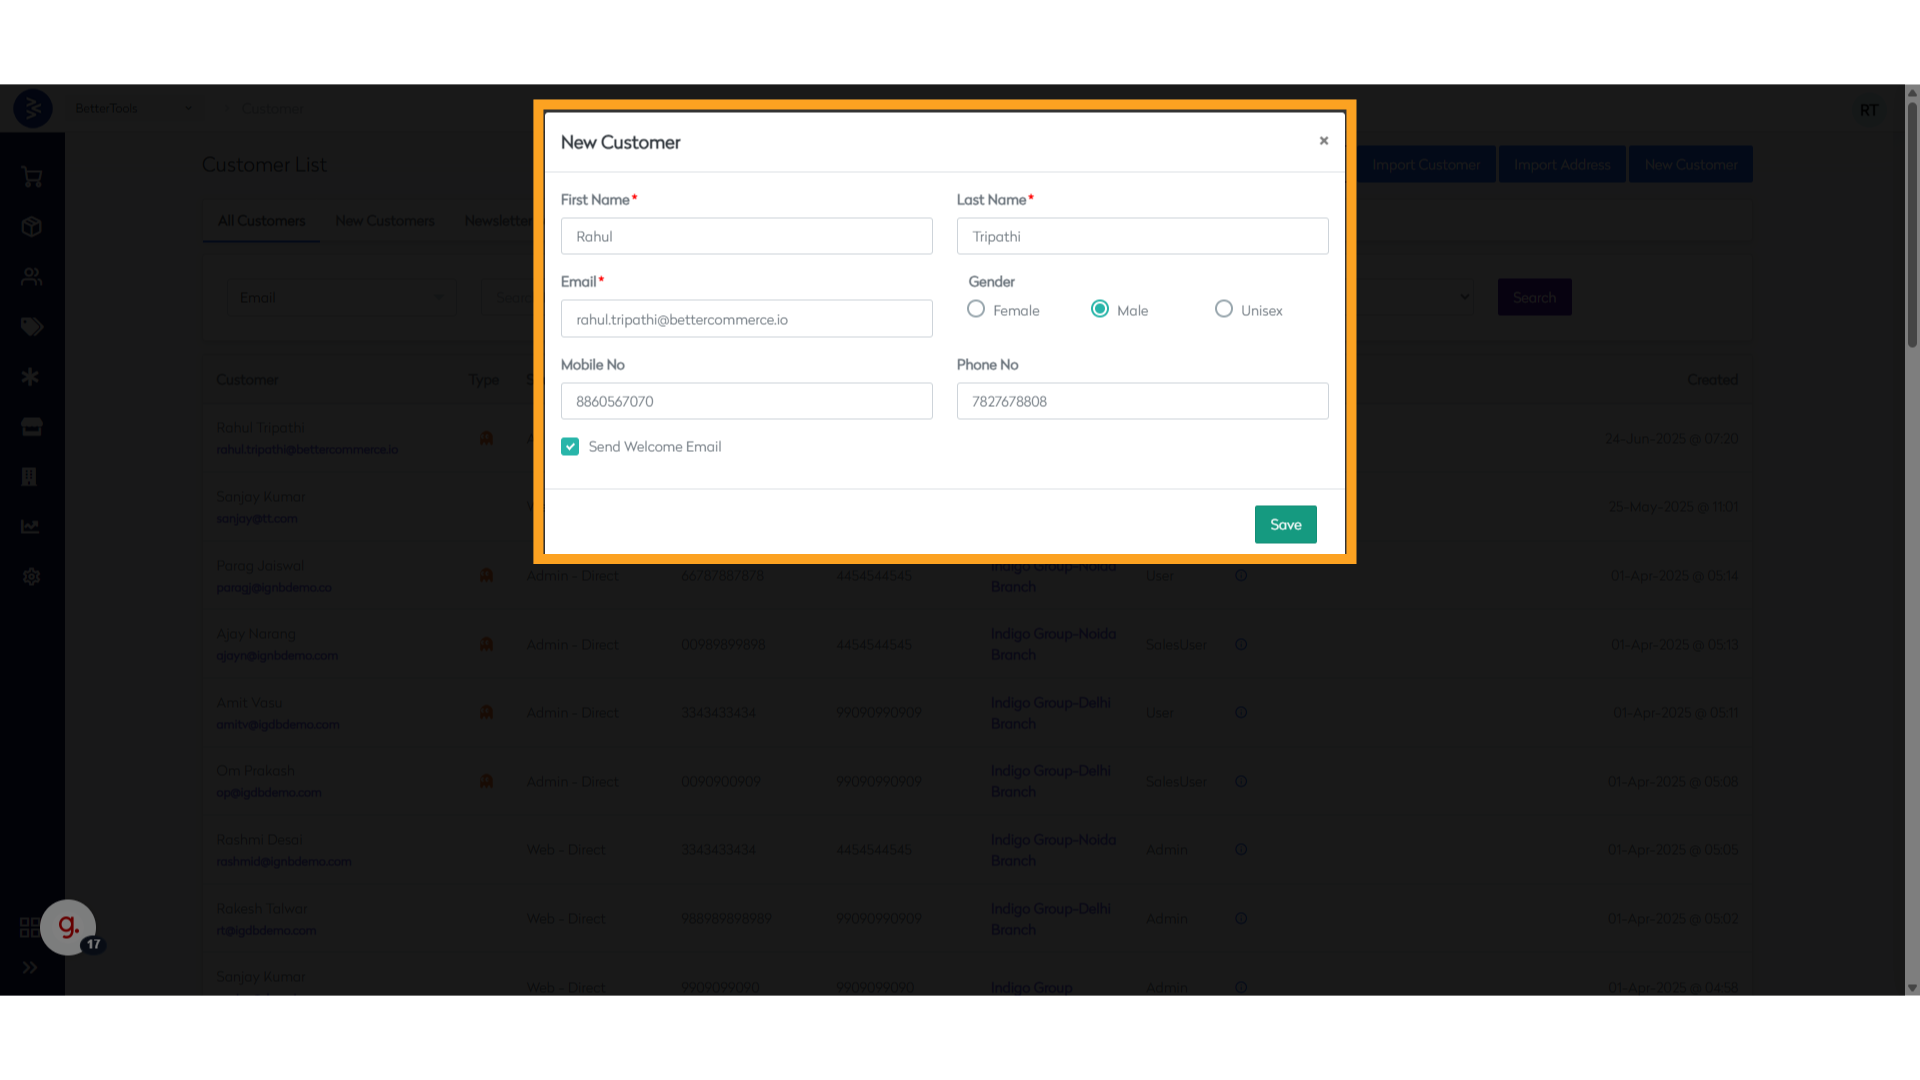
- First Name
- Last Name
- Gender
- Mobile No
- Phone No (optional)
- Send Welcome Email (checkbox)
-
Click Save to create the customer account.
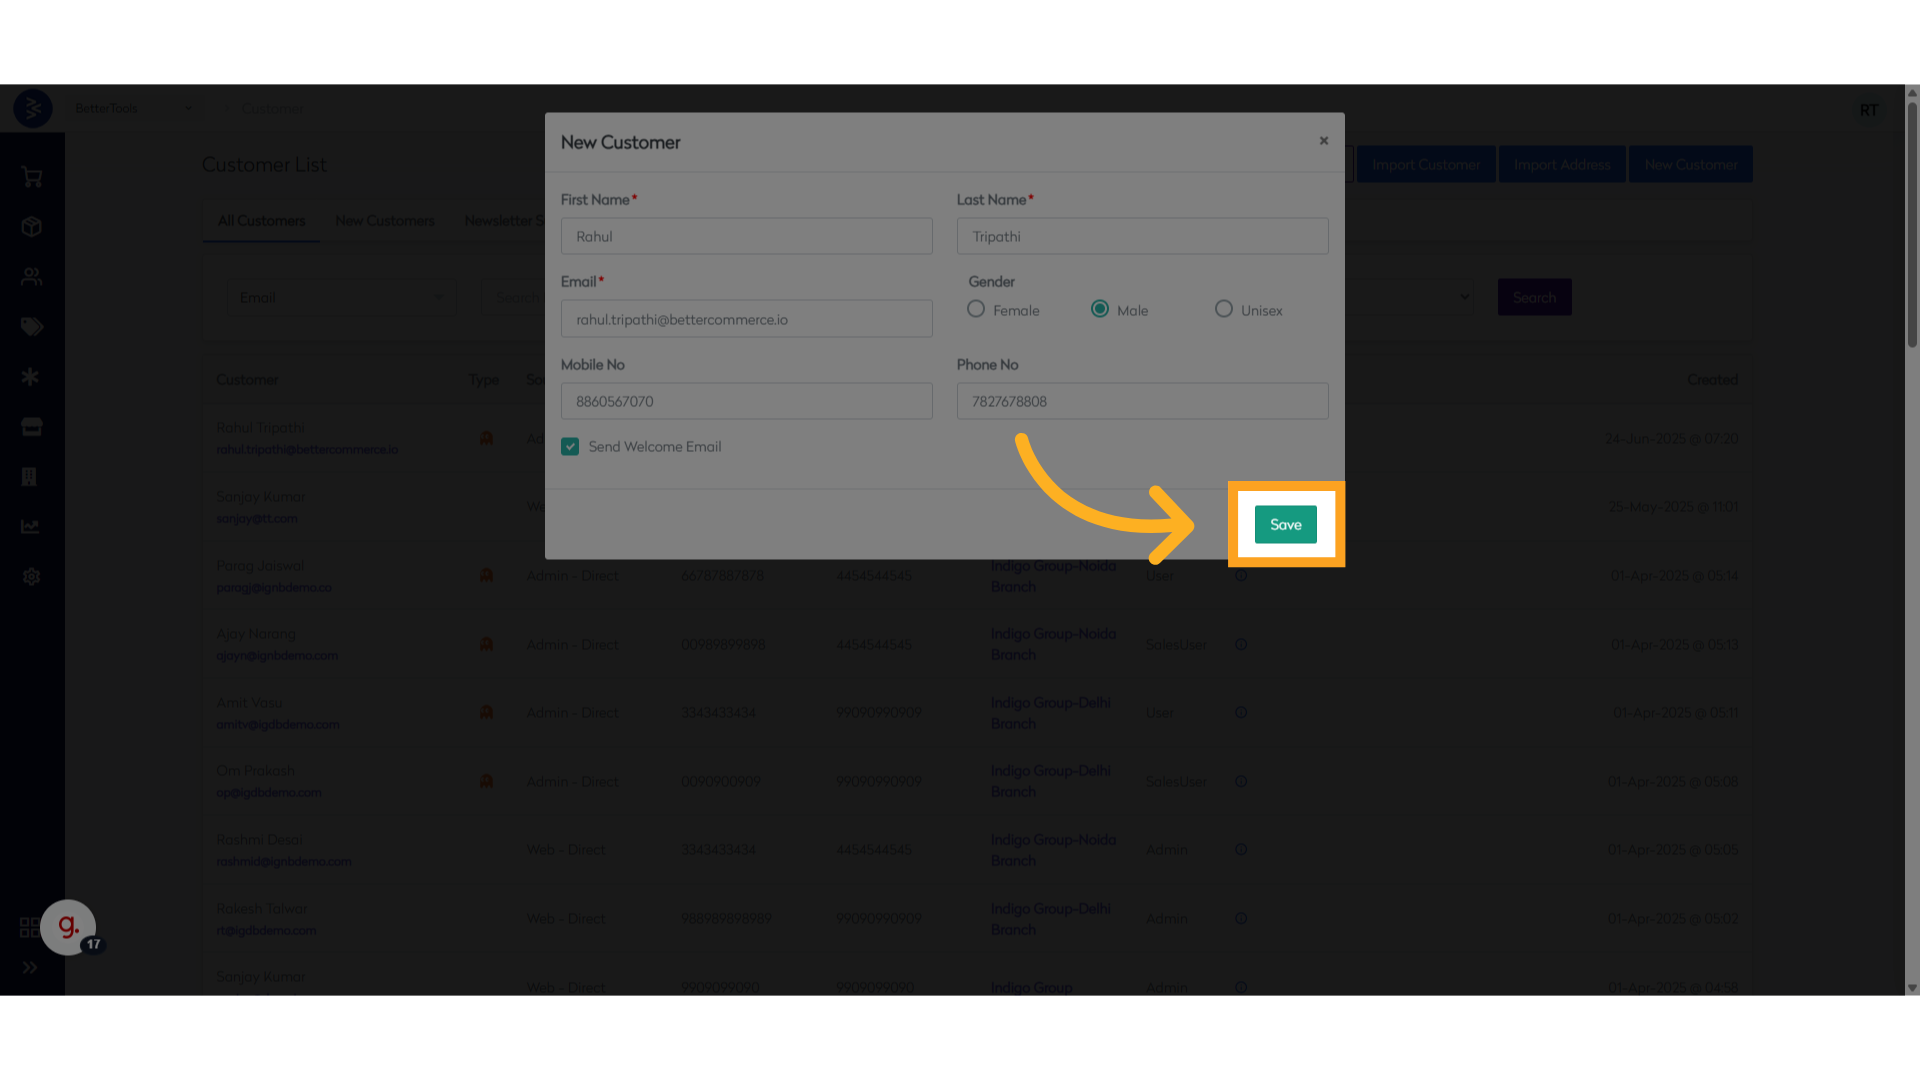
✅ Once saved, the customer will appear in the main customer list and can be edited or managed further through the customer detail view.

How to edit an existing customer's details
Below is the list of fields that are editable for an existing Customer:
Basic Information
| Field | Description | Format |
|---|---|---|
| First Name | Customer's given name | Text |
| Last Name | Customer's family name | Text |
| Primary email address | Email format | |
| PhoneNo | Mobile phone number | Numeric |
| Telephone | Alternative contact number | Numeric |
| Gender | Gender of the customer | Dropdown (Male/Female/Unisex) |
| Date Of Birth | Date of birth of the user | Date (DD/MM/YYYY) |
| User Source Type | Source of customer creation | Dropdown (Web,Store,Admin etc.) |
| Is Black Listed | If the user is blacklisted | Toggle (Yes/No) |
| Is Blocked | If the user is blocked for the store | Toggle (Yes/No) |
| IsRegistered | Account registration status | Toggle (Yes/No) |
| Notify By Email | Email Notification consent | Toggle (Yes/No) |
| Notify By SMS | SMS Notification consent | Toggle (Yes/No) |
| Notify By Post | Post Notification consent | Toggle (Yes/No) |
| Notify By WhatsApp | WhatsApp Notification consent | Toggle (Yes/No) |
| Customer Group | Customer group assignment | Text + Selection |
| Customer Groups | - Capacity - Count | Text |
Account Settings
Preferences
| Field | Description | Format |
|---|---|---|
| Language | Preferred language | Dropdown |
| Currency | Preferred currency | Dropdown |
| Newsletter | Marketing preferences | Multiple checkboxes |
| Communication | Contact preferences | Multiple checkboxes |
Account Status
| Field | Description | Format |
|---|---|---|
| Active Status | Account active/inactive | Toggle |
| Block Status | Account restrictions | Toggle |
| User Role | System role assignment | Dropdown |
Notes and Custom Fields
Customer Notes
| Field | Description | Format |
|---|---|---|
| Internal Notes | Staff comments | Text area |
| Customer Tags | Classification tags | Multiple select |
| Custom Fields | Additional attributes | Various |
Access Control
| Field | Description | Format |
|---|---|---|
| Password Reset | Force password change | Button |
| Account Lock | Temporary restriction | Toggle |
| Login Attempts | Reset counter | Button |
Managing Address Book
Maintain and organize multiple shipping and billing addresses for each customer, ensuring accurate order fulfillment and returns.
Address
Billing Address
| Field | Description | Format |
|---|---|---|
| Address Line 1 | Primary address line | Text |
| Address Line 2 | Secondary address line | Text |
| City | City name | Text |
| State/Province | State or region | Text |
| Post Code | Postal/ZIP code | Alphanumeric |
| Country | Country selection | Dropdown |
Shipping Address
| Field | Description | Format |
|---|---|---|
| Address Line 1 | Delivery address line 1 | Text |
| Address Line 2 | Delivery address line 2 | Text |
| City | Delivery city | Text |
| State/Province | Delivery state/region | Text |
| Post Code | Delivery postal code | Alphanumeric |
| Country | Delivery country | Dropdown |
Importing and Exporting Customers
The bulk import functionality in CommerceHub allows users to quickly while onboard large sets of customer data and their corresponding addresses using structured CSV or Excel files. This eliminates the need for manual entry and helps streamline operations, especially during system migrations, onboarding, or updates to customer databases.
Import Customer using Bulk Import
Used to import customer information this method is ideal when adding a new set of customers to the platform or updating existing profiles in large numbers.
Key Benefits:
- Reduces manual data entry
- Supports bulk onboarding
- Helps maintain consistent and accurate customer records
Follow the steps below to import customer records in bulk using a CSV or Excel file:
- Open the customer listing screen by navigating to
Customers > View.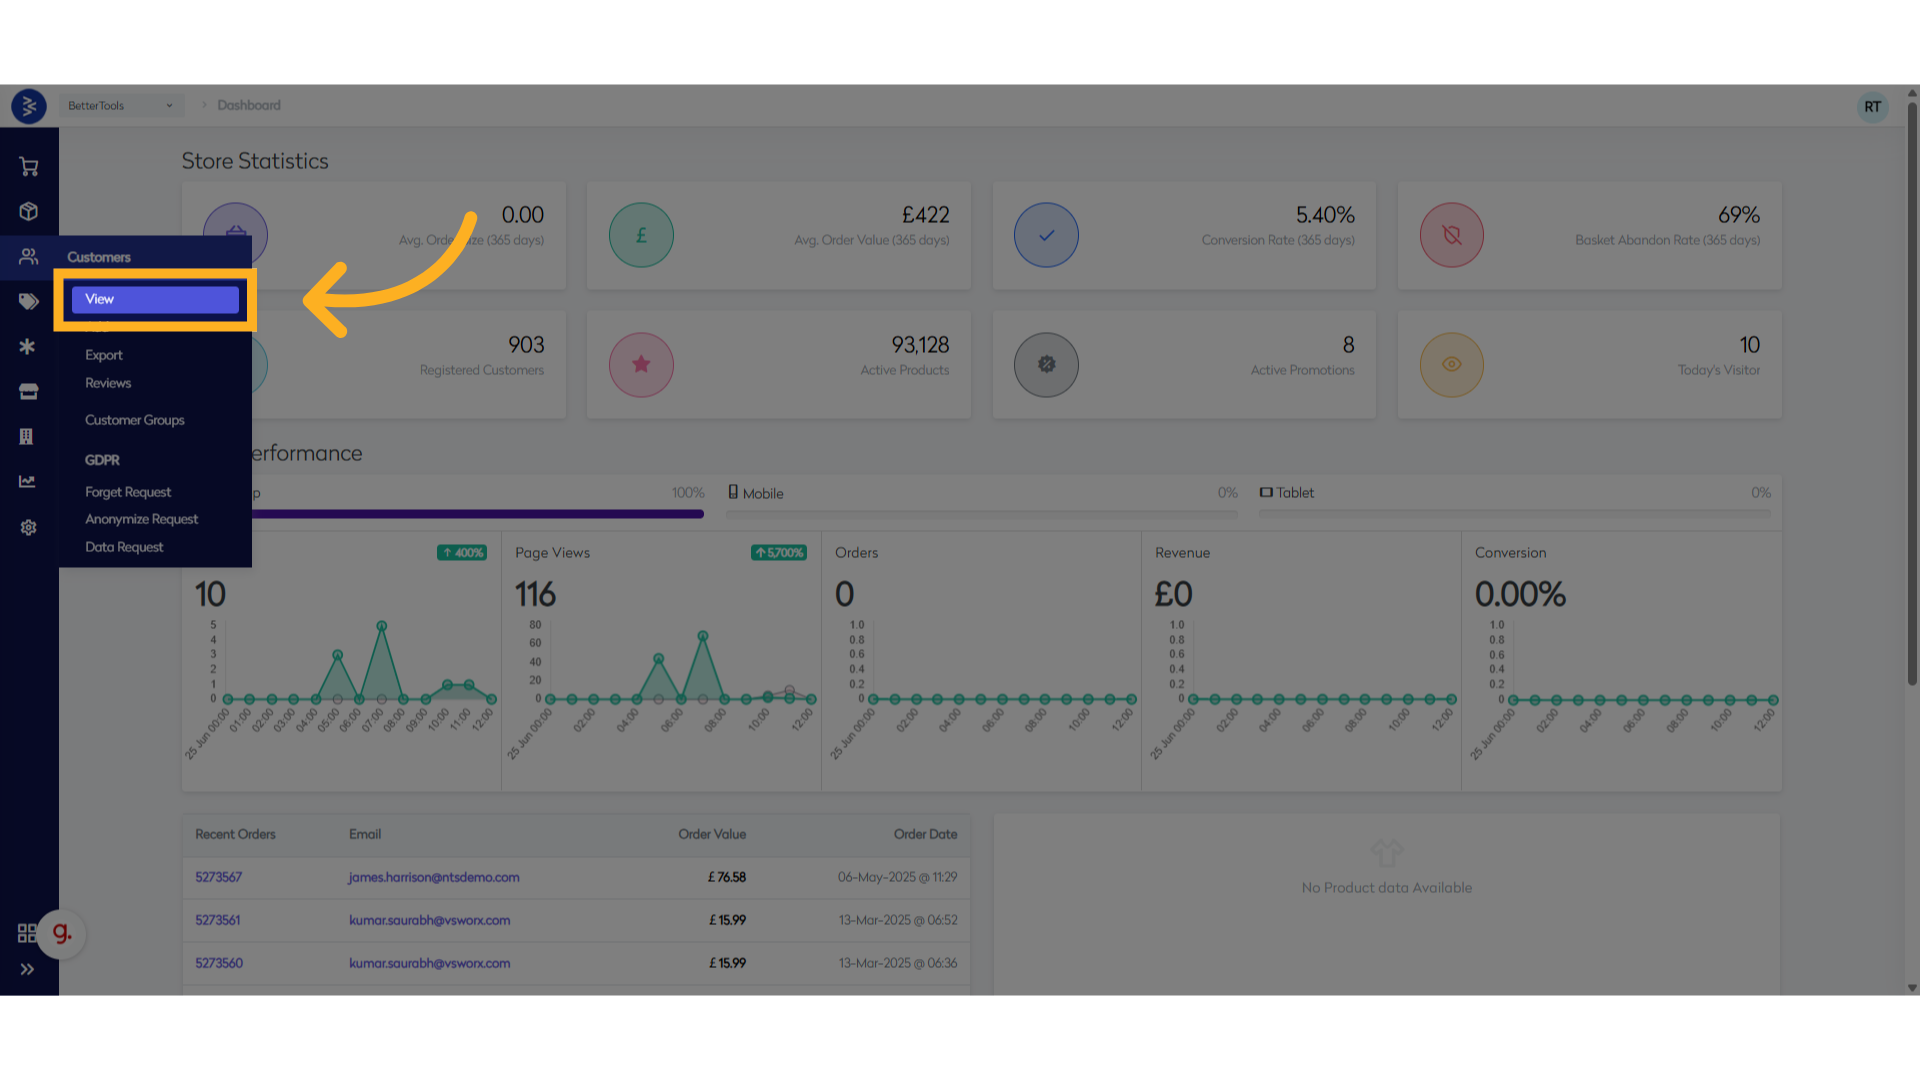
- Click on Import Customer at the top right of the page.
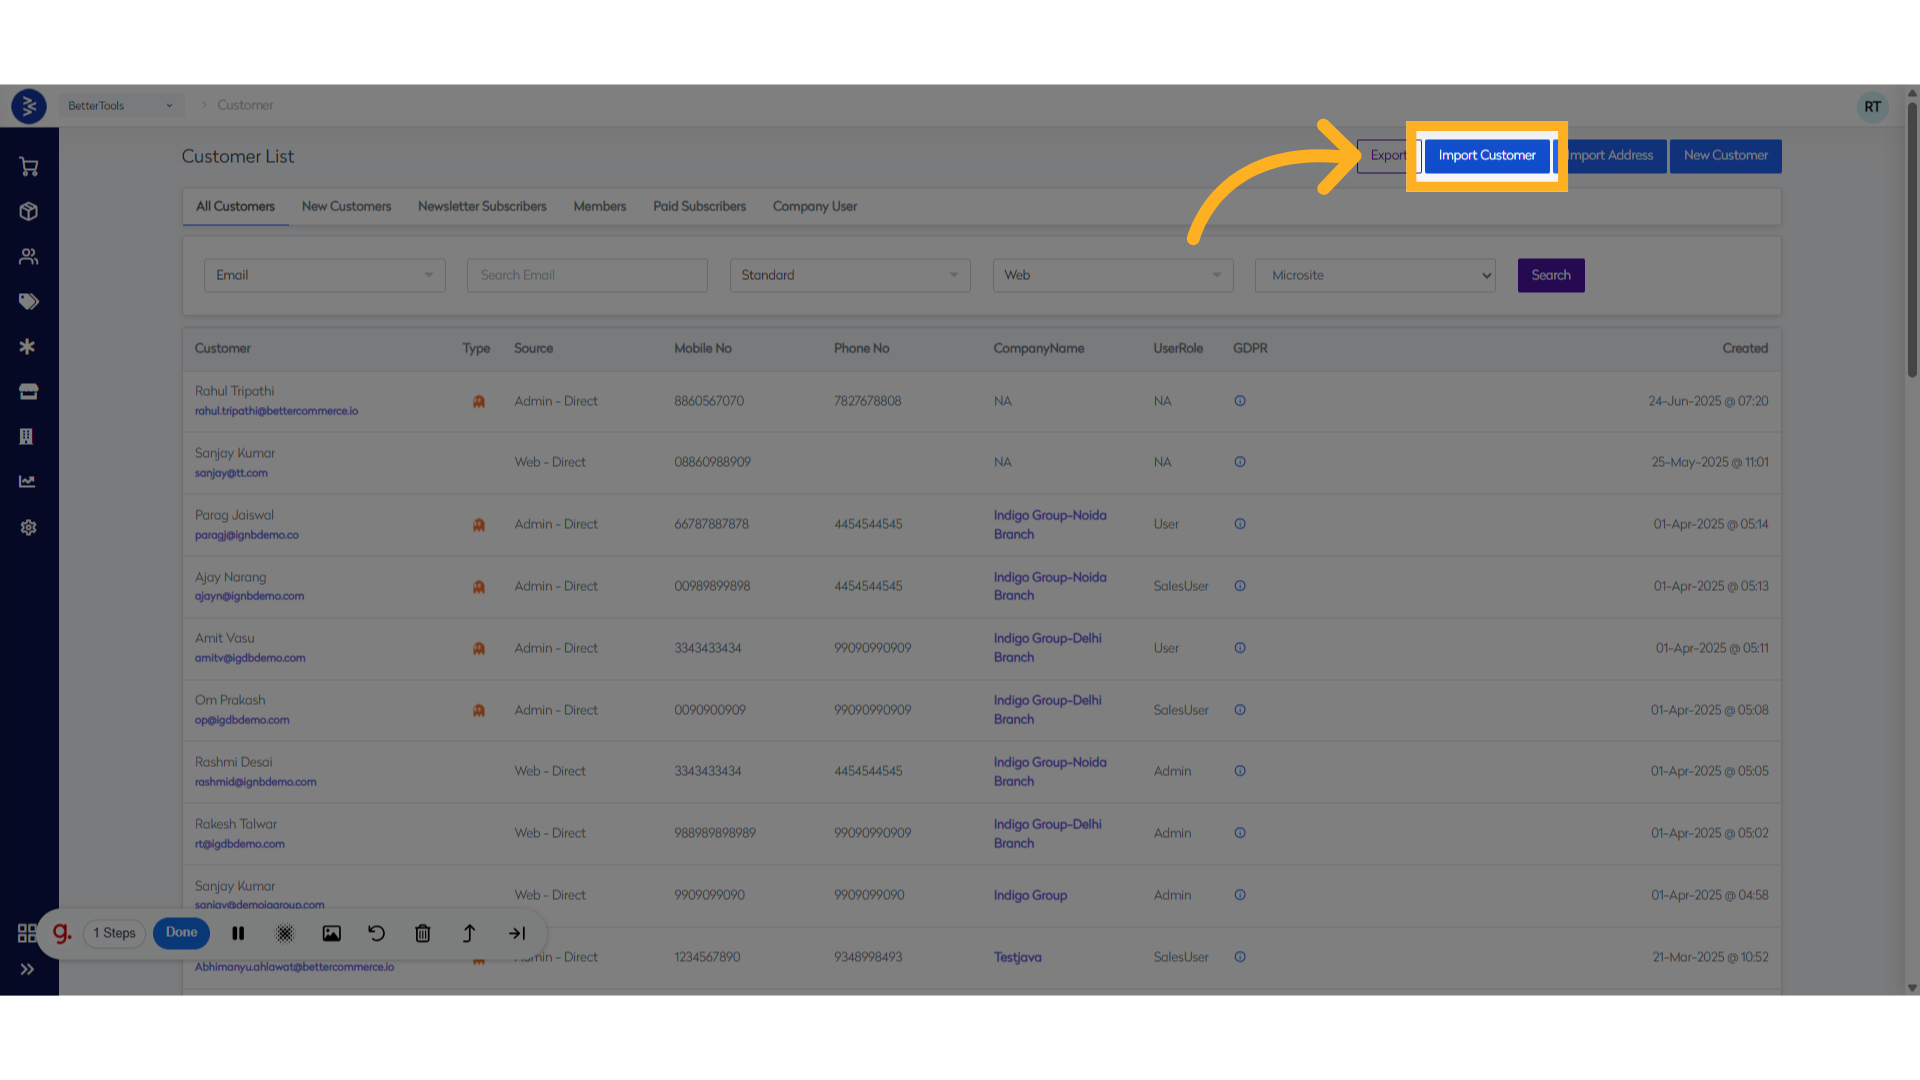
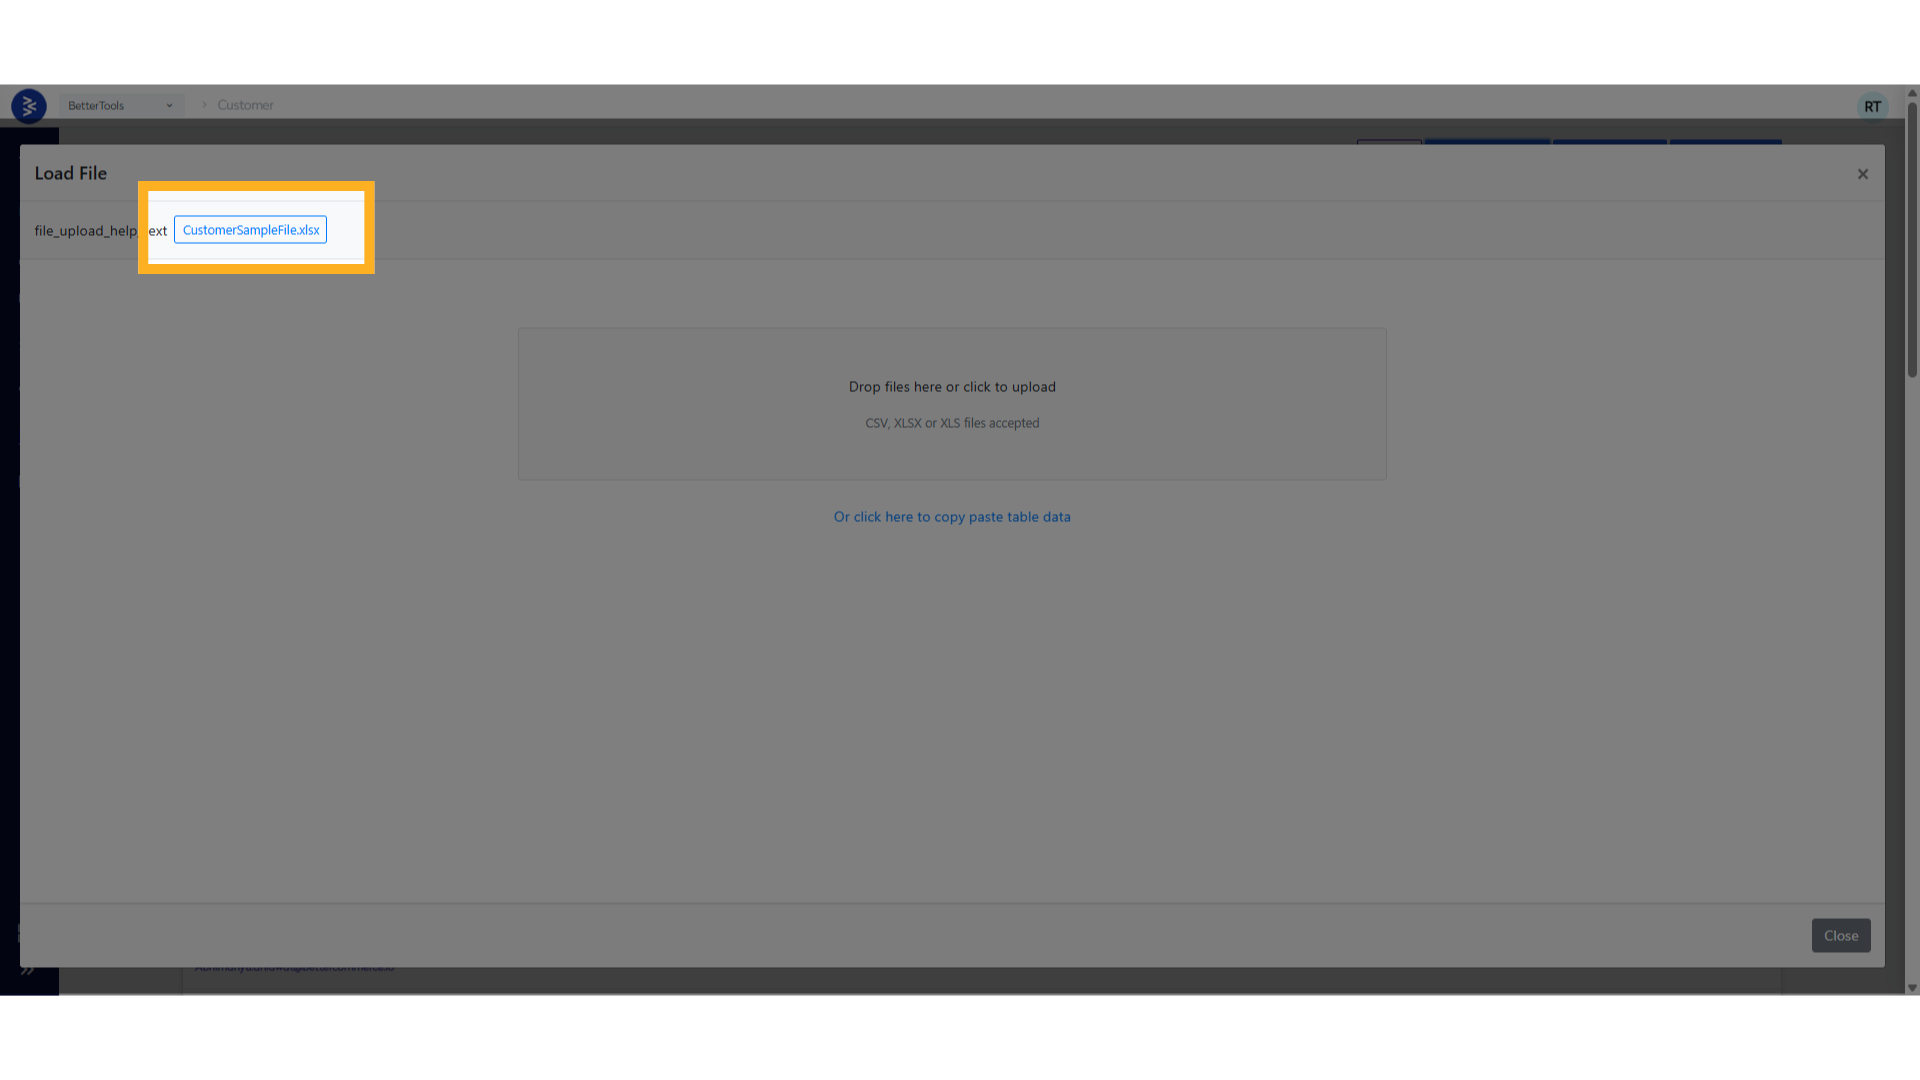
- Download the sample file from here and prepare your data accordingly.
Below is a list of fields used when importing customer addresses in bulk, along with their descriptions and expected values.
| Field Name | Description |
|---|---|
| Title | Customer's title (e.g., Mr, Ms, Dr) |
| UserName | Unique username used for login or internal system reference |
| FirstName | Customer's first name |
| MiddleName | Customer's middle name (optional) |
| LastName | Customer's last name |
| Customer's primary email address | |
| PhoneNo | Customer's mobile or primary contact number |
| Gender | Customer's gender (M, F, Unisex) |
| NotifyEmail | Set 1 to allow email notifications, 0 to disable |
| NotifySMS | Set 1 to allow SMS notifications, 0 to disable |
| NotifyPost | Set 1 to allow postal notifications, 0 to disable |
| NewsletterSubscribe | Set 1 if the customer is subscribed to newsletters, 0 otherwise |
| DayOfBirth | Day of birth (1–31); set 0 if unknown |
| MonthOfBirth | Month of birth (1–12); set 0 if unknown |
| YearOfBirth | Year of birth (e.g., 1985); set 0 if unknown |
| CompanyCode | Code or ID for associated company (used in B2B setup) |
| CompanyRole | Role of the user within the company (e.g., Admin, User, Buyer) |
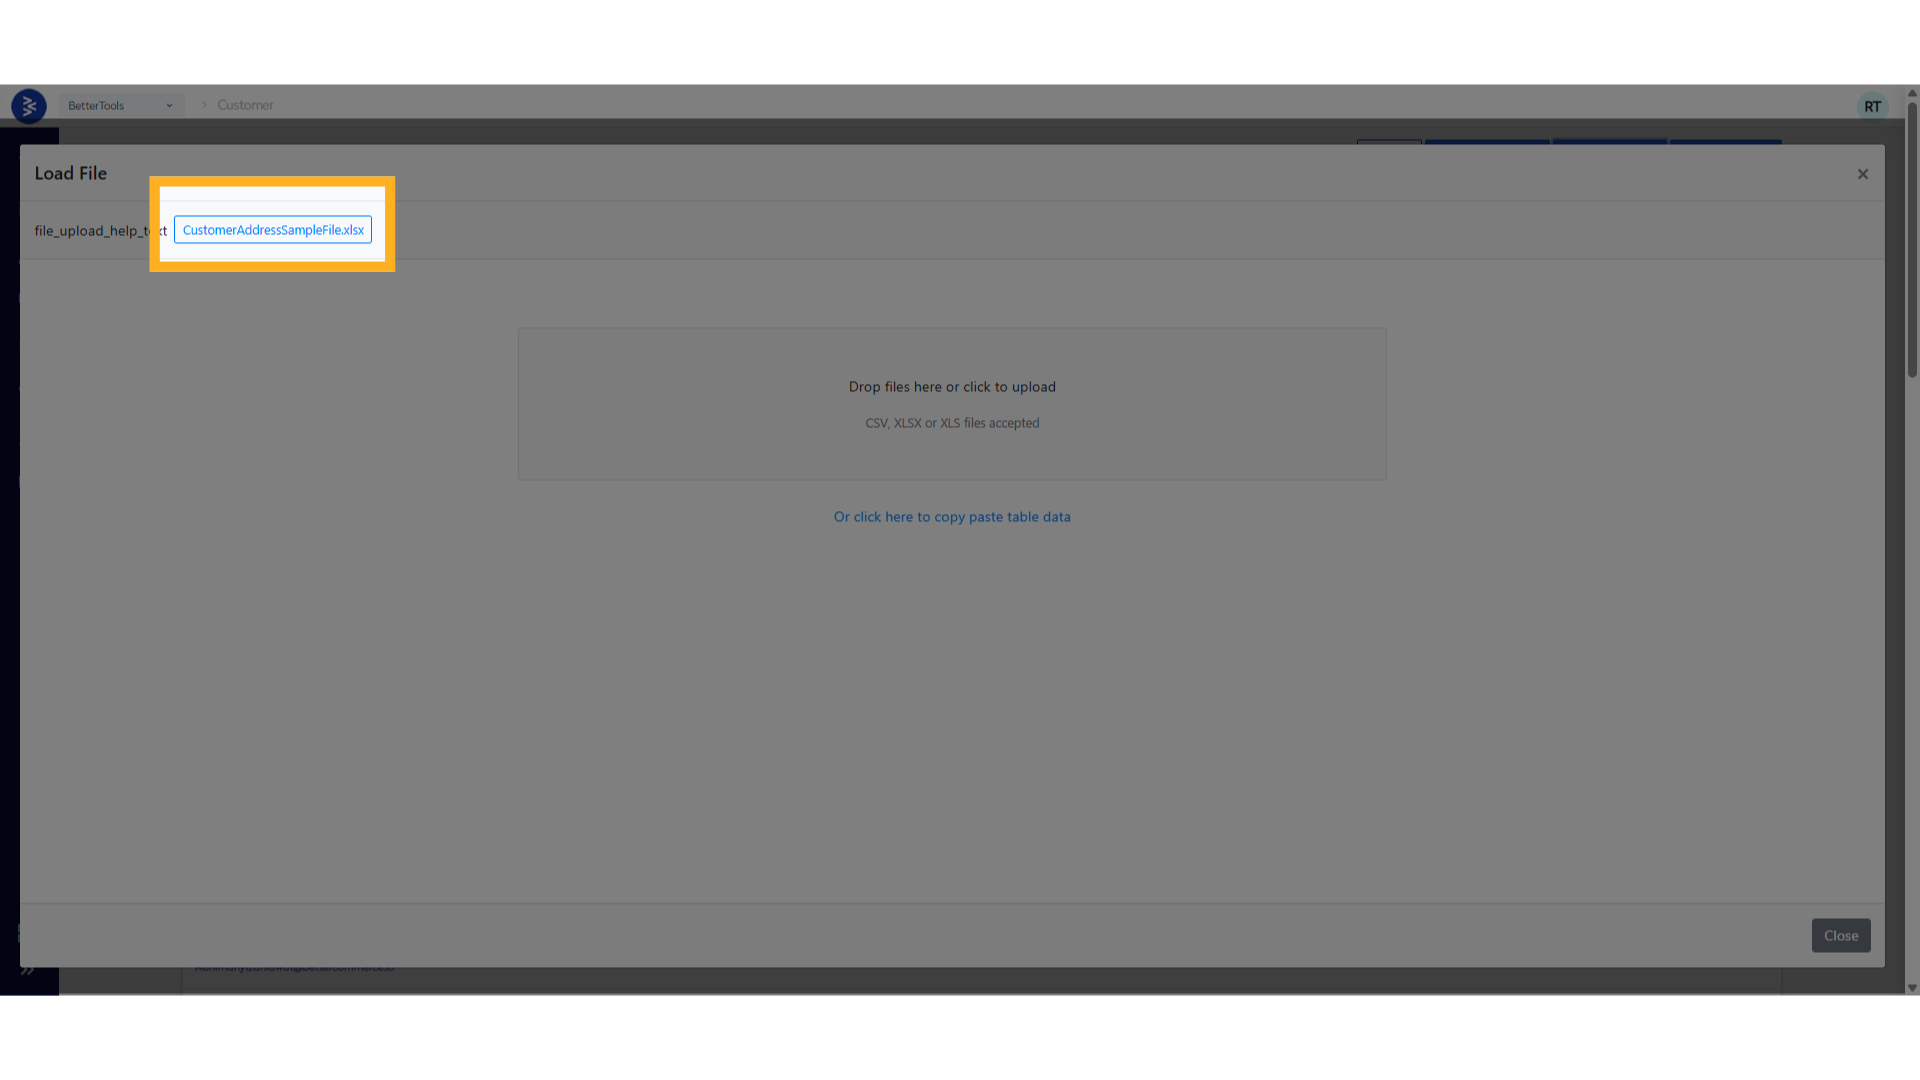
-
Click on "Drop files here or click to upload" and select your CSV, XLSX, or XLS file.
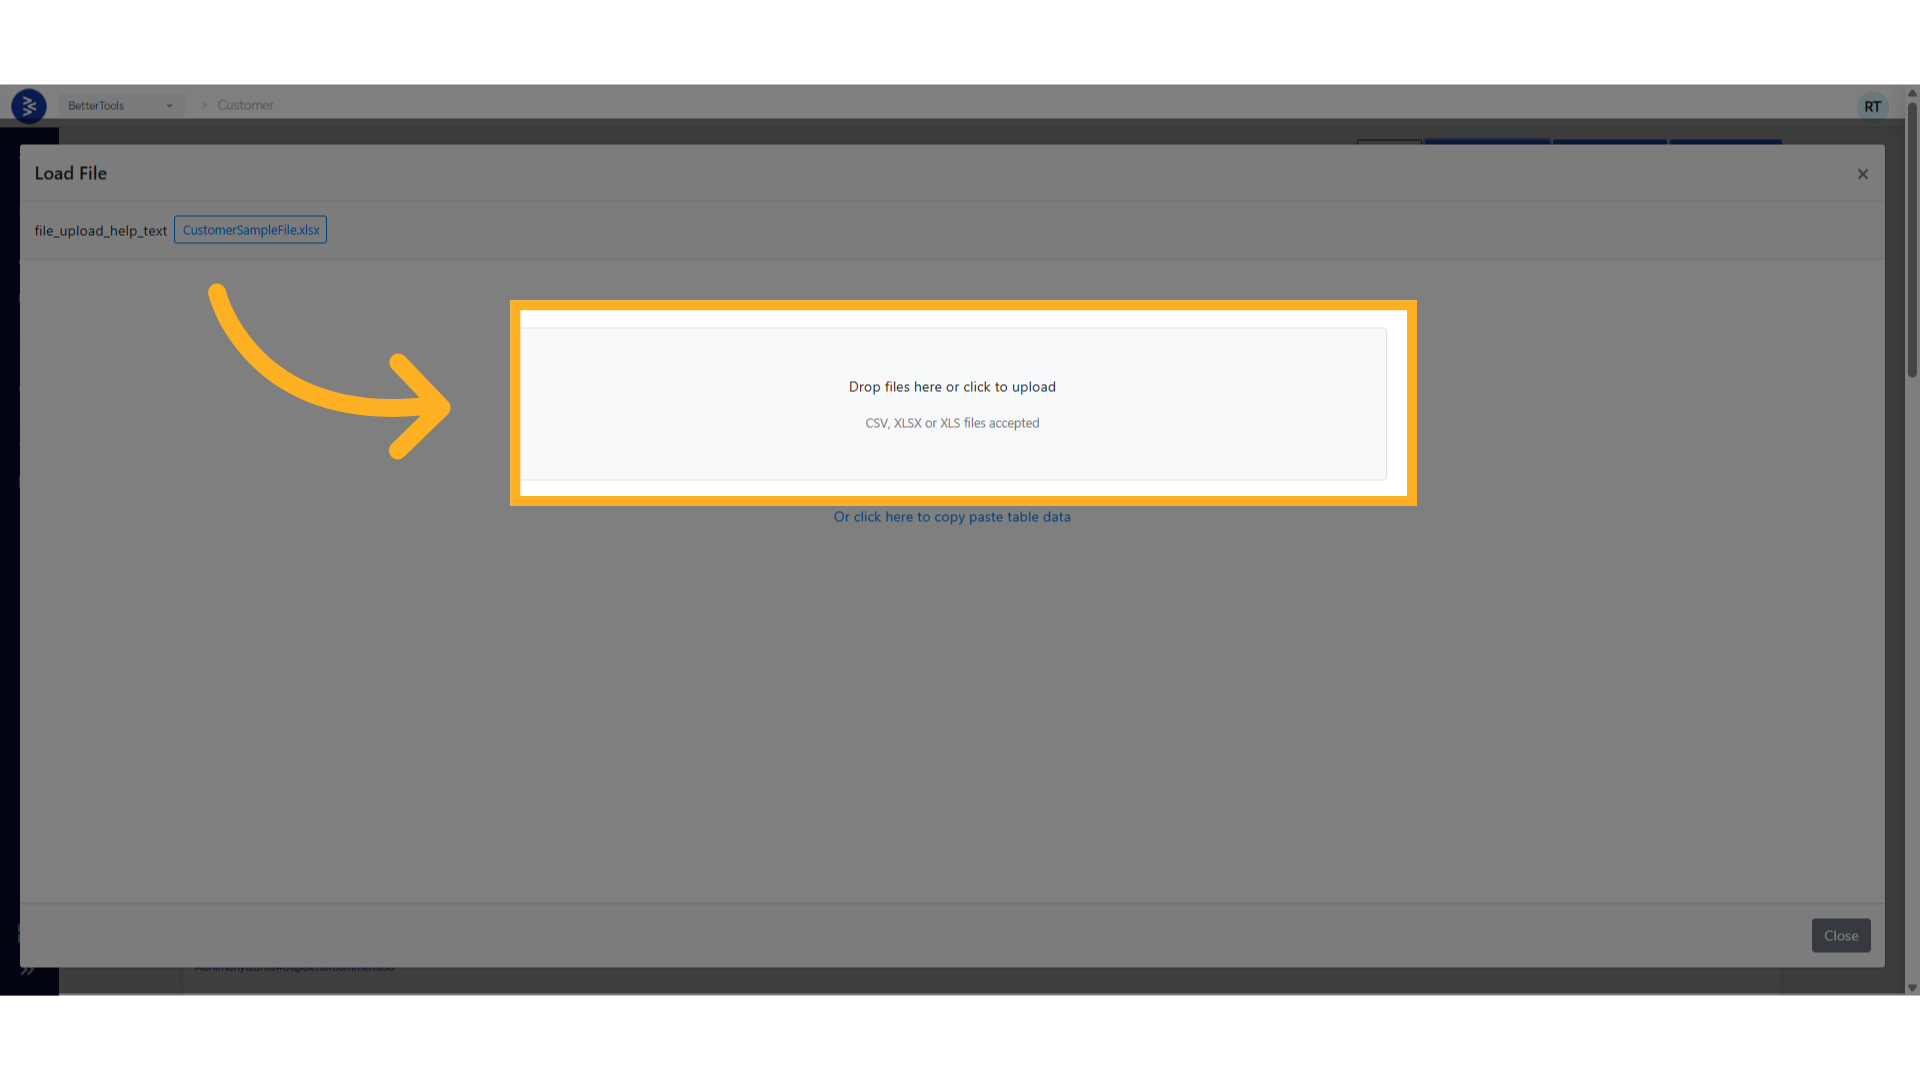
-
After verifying all the uploaded data, click Submit to complete the import process.
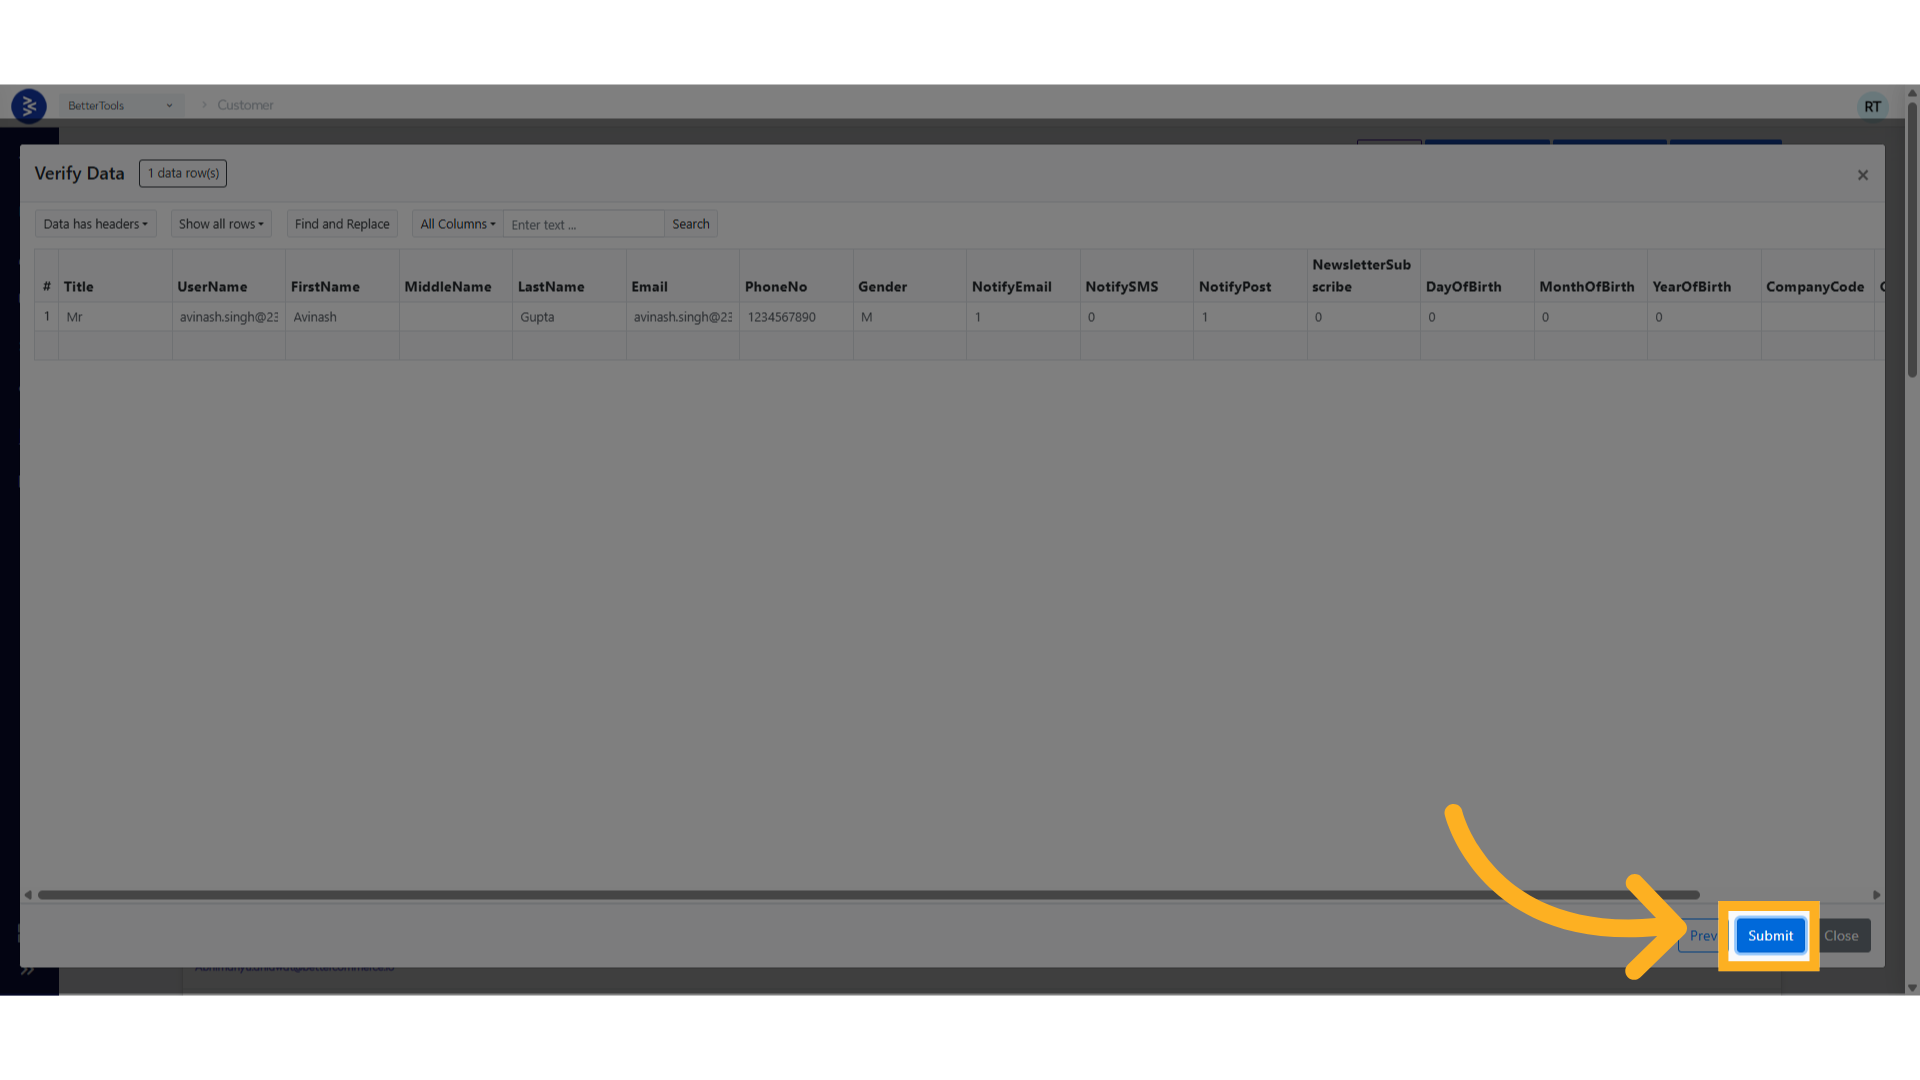
Make sure all required fields are correctly filled and data types are consistent with the sample format.
Import Customer's Address using Bulk Import
Used to import addresses associated with customers, including shipping, billing, and subscription defaults. Each address entry must be linked to an existing customer through the username or email.
Key Benefits:
- Easily update or assign multiple addresses to customers
- Supports setting default delivery and billing addresses
- Useful for migrating existing address books from other systems
Follow the steps below to import addresses to customer records in bulk using a CSV or Excel file:
-
Open the customer listing screen by navigating to
Customers > View, and click on Import Address at the top right of the page.
-
Download the sample file provided and prepare your address data accordingly.
Below is a list of fields used when importing customer addresses in bulk, along with their descriptions and expected values.
| Field Name | Description |
|---|---|
| UserName | The registered email or username of the customer to whom the address belongs |
| AddressType | Type of address (2 for Shipping, 1 for Billing, or Both) |
| Title | Customer’s title (e.g., Mr, Ms, Dr) |
| FirstName | Customer’s first name |
| LastName | Customer’s last name |
| PhoneNo | Contact number for the address |
| Address1 | Primary address line (e.g., street name, house number) |
| Address2 | Secondary address line (e.g., apartment, suite) |
| Address3 | Additional address details (optional) |
| City | City name |
| State | State or province |
| PostCode | Postal or ZIP code |
| Country | Full country name (e.g., United Kingdom, India) |
| CountryCode | ISO alpha-2 country code (e.g., GB, IN) |
| IsDefaultDelivery | Set 1 if this is the default delivery/shipping address, else 0 |
| IsDefaultBilling | Set 1 if this is the default billing address, else 0 |
| IsDefault | Set 1 if this address is both default billing and delivery, else 0 |
| IsDefaultForSubscription | Set 1 if this is the default address for subscription deliveries, else 0 |
| Label | Friendly name/label for the address (e.g., Home, Office) |
-
Click on "Drop files here or click to upload" and select your
.CSV,.XLSX, or.XLSfile.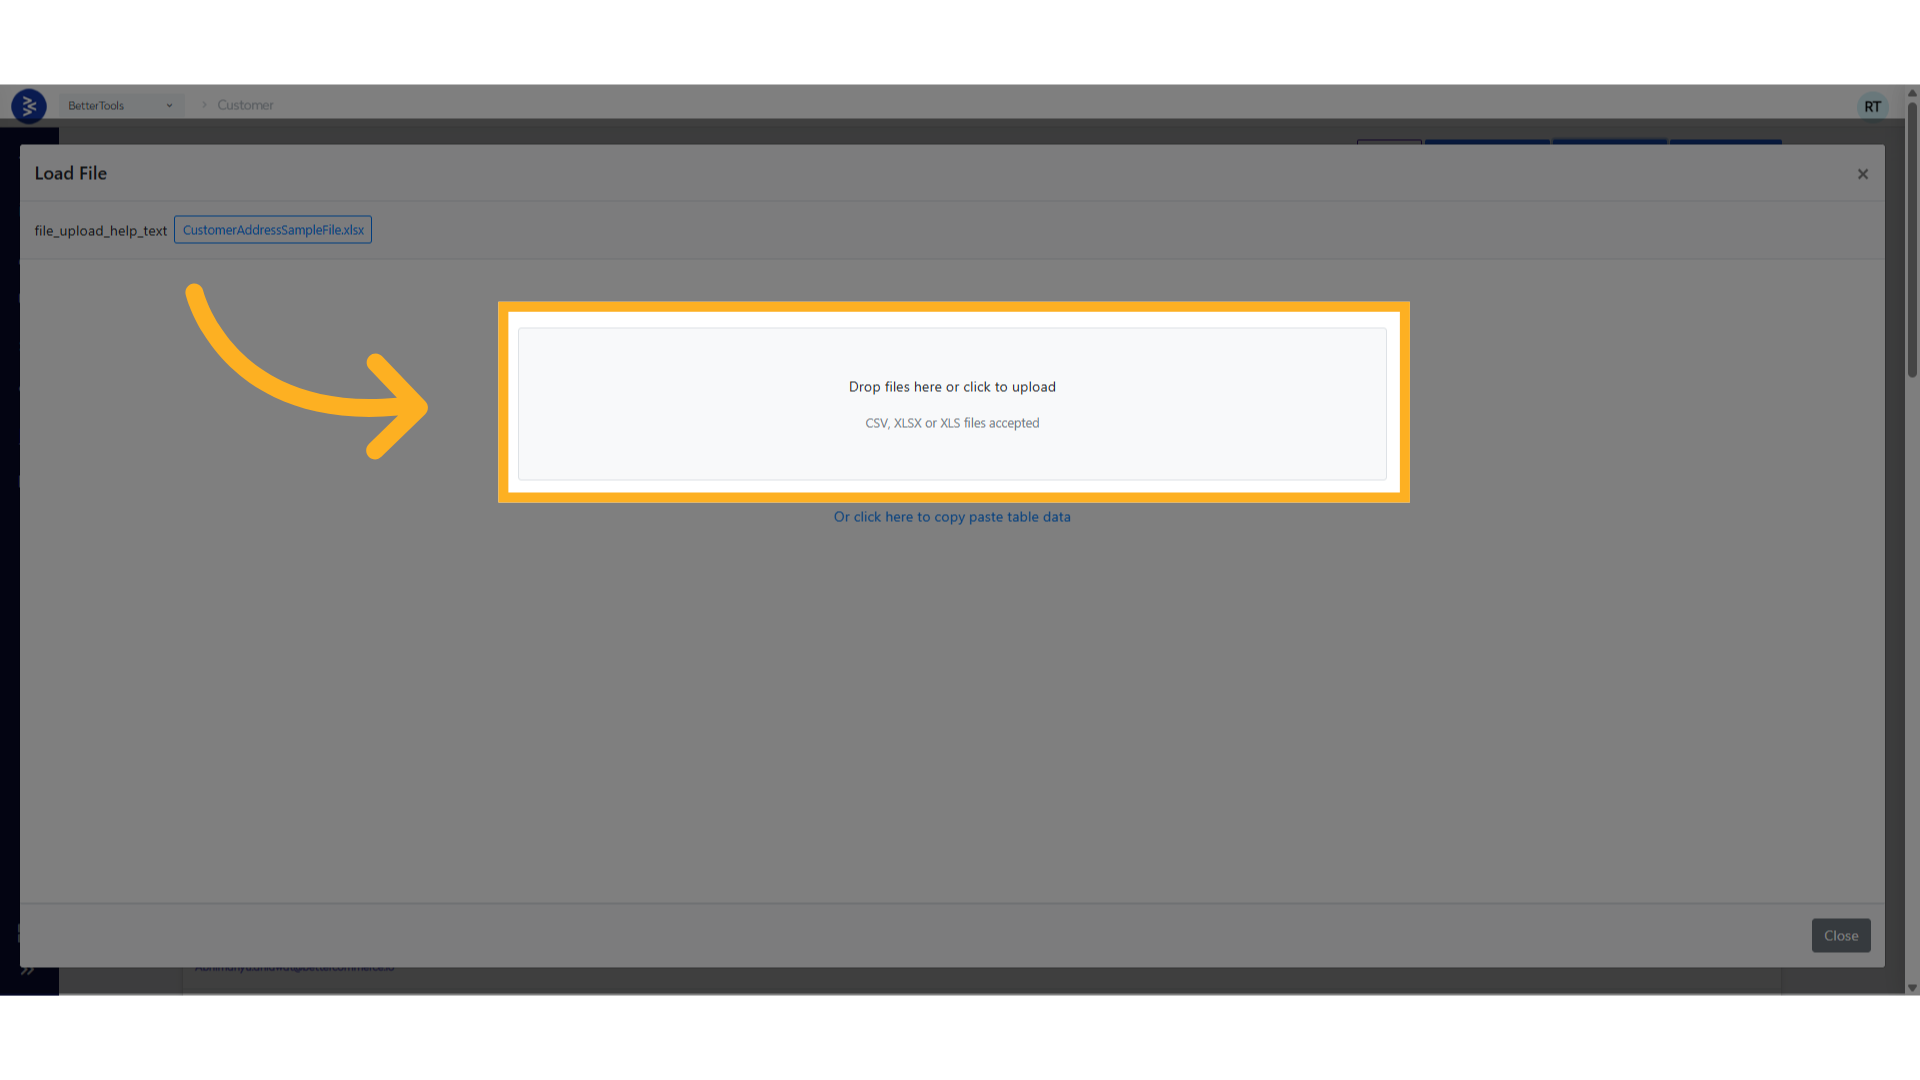
-
After verifying the uploaded data, click Submit to complete the import process.
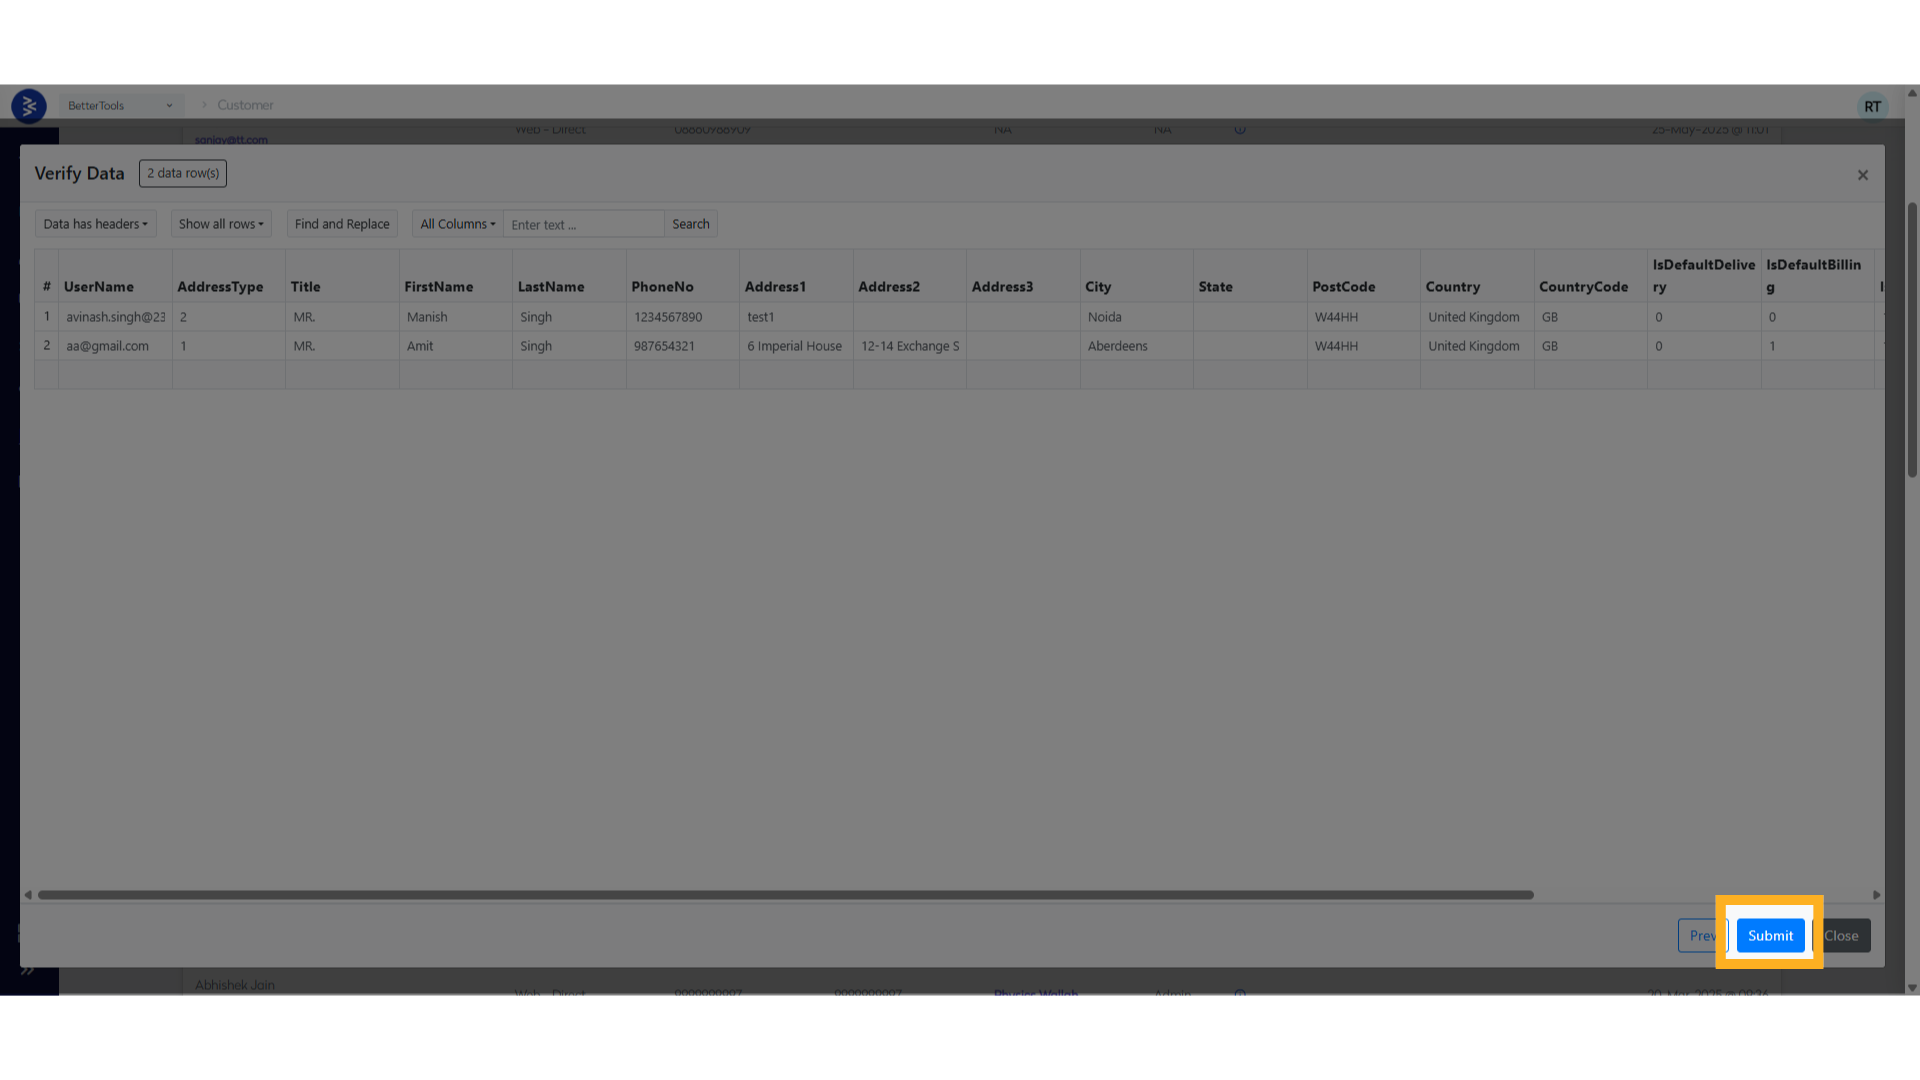
Ensure the
UserNamefield matches an existing customer and the address fields are correctly formatted for a successful import.
Export Customers
Easily export customer records using predefined date range filters such as Today, This Week, This Month, Last Month, and Last Year. These flexible filters allow you to quickly download relevant customer data without manually entering custom date ranges. Ideal for reporting, analysis, or integration.
Follow the steps below to export customers as an Excel file:
-
From the CommerceHub Dashboard, navigate to
Customer > Viewto open the customer listing page and click on Export.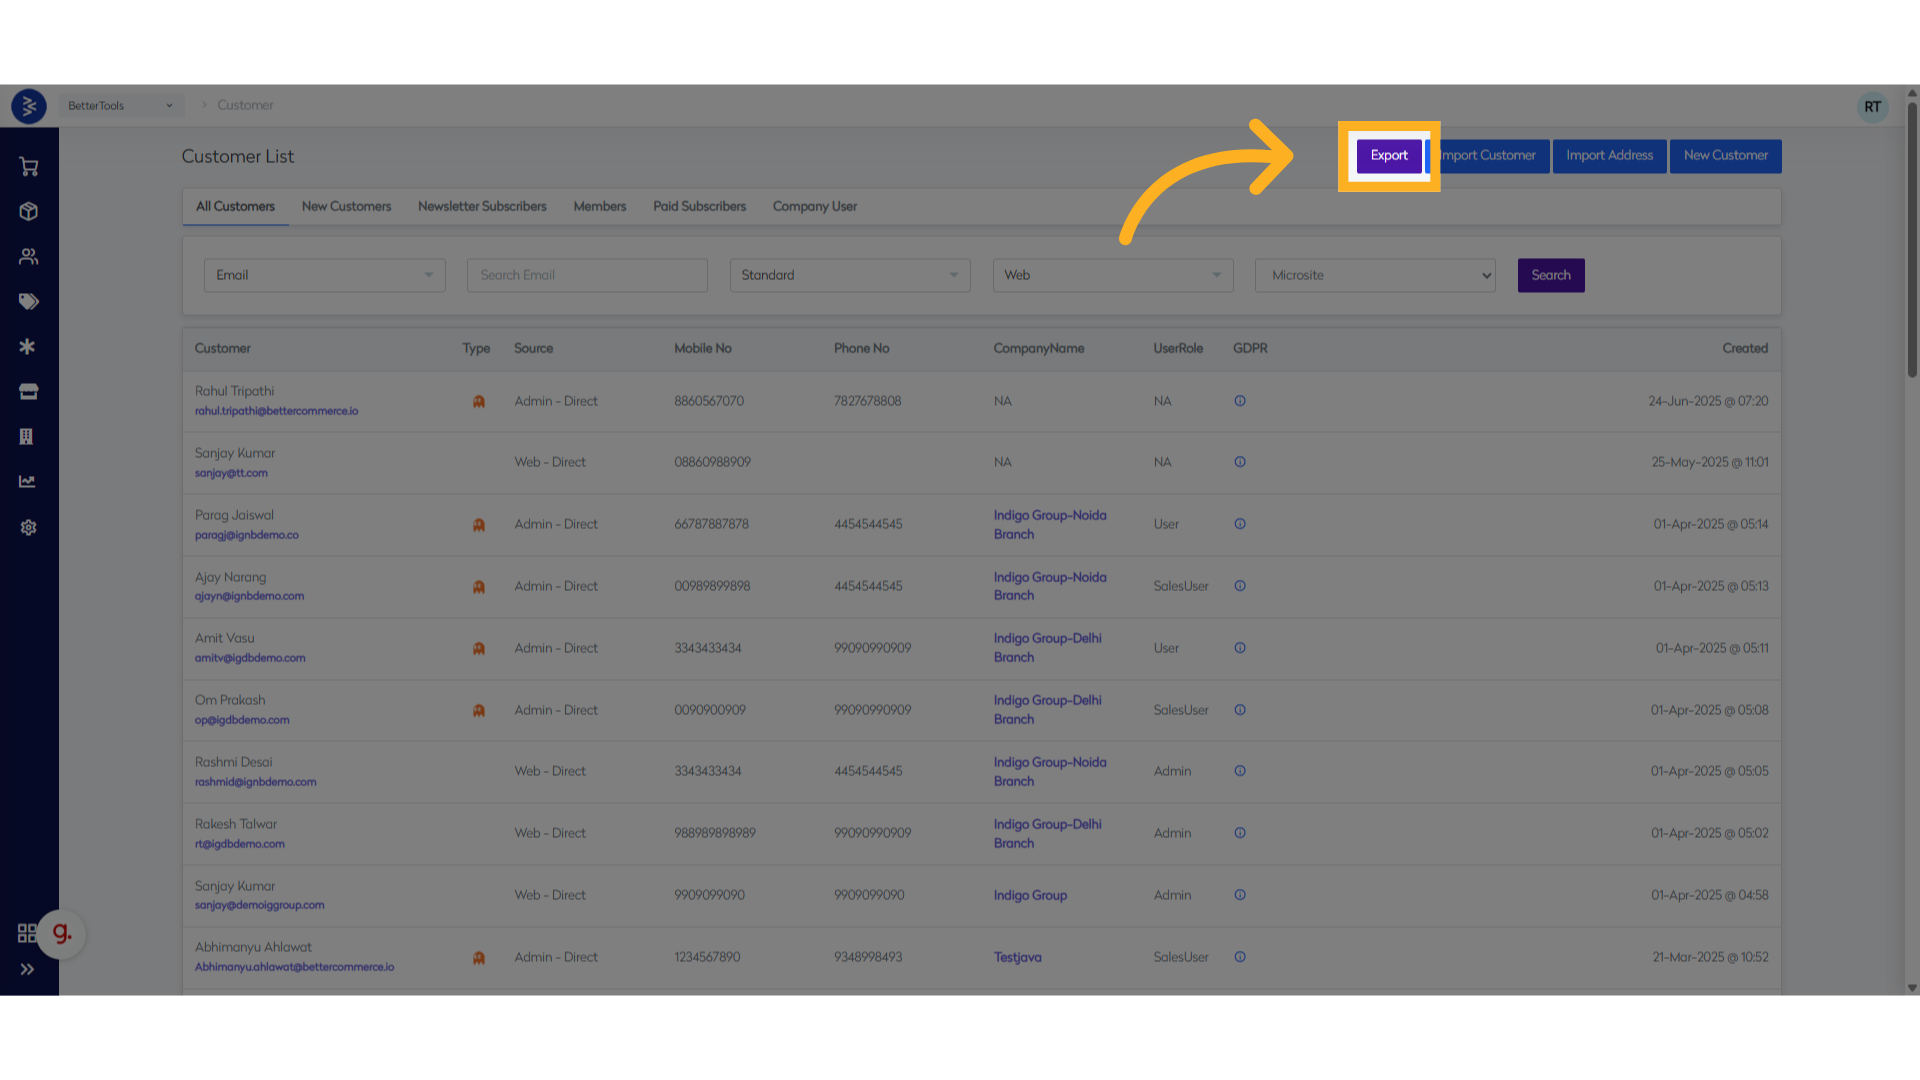
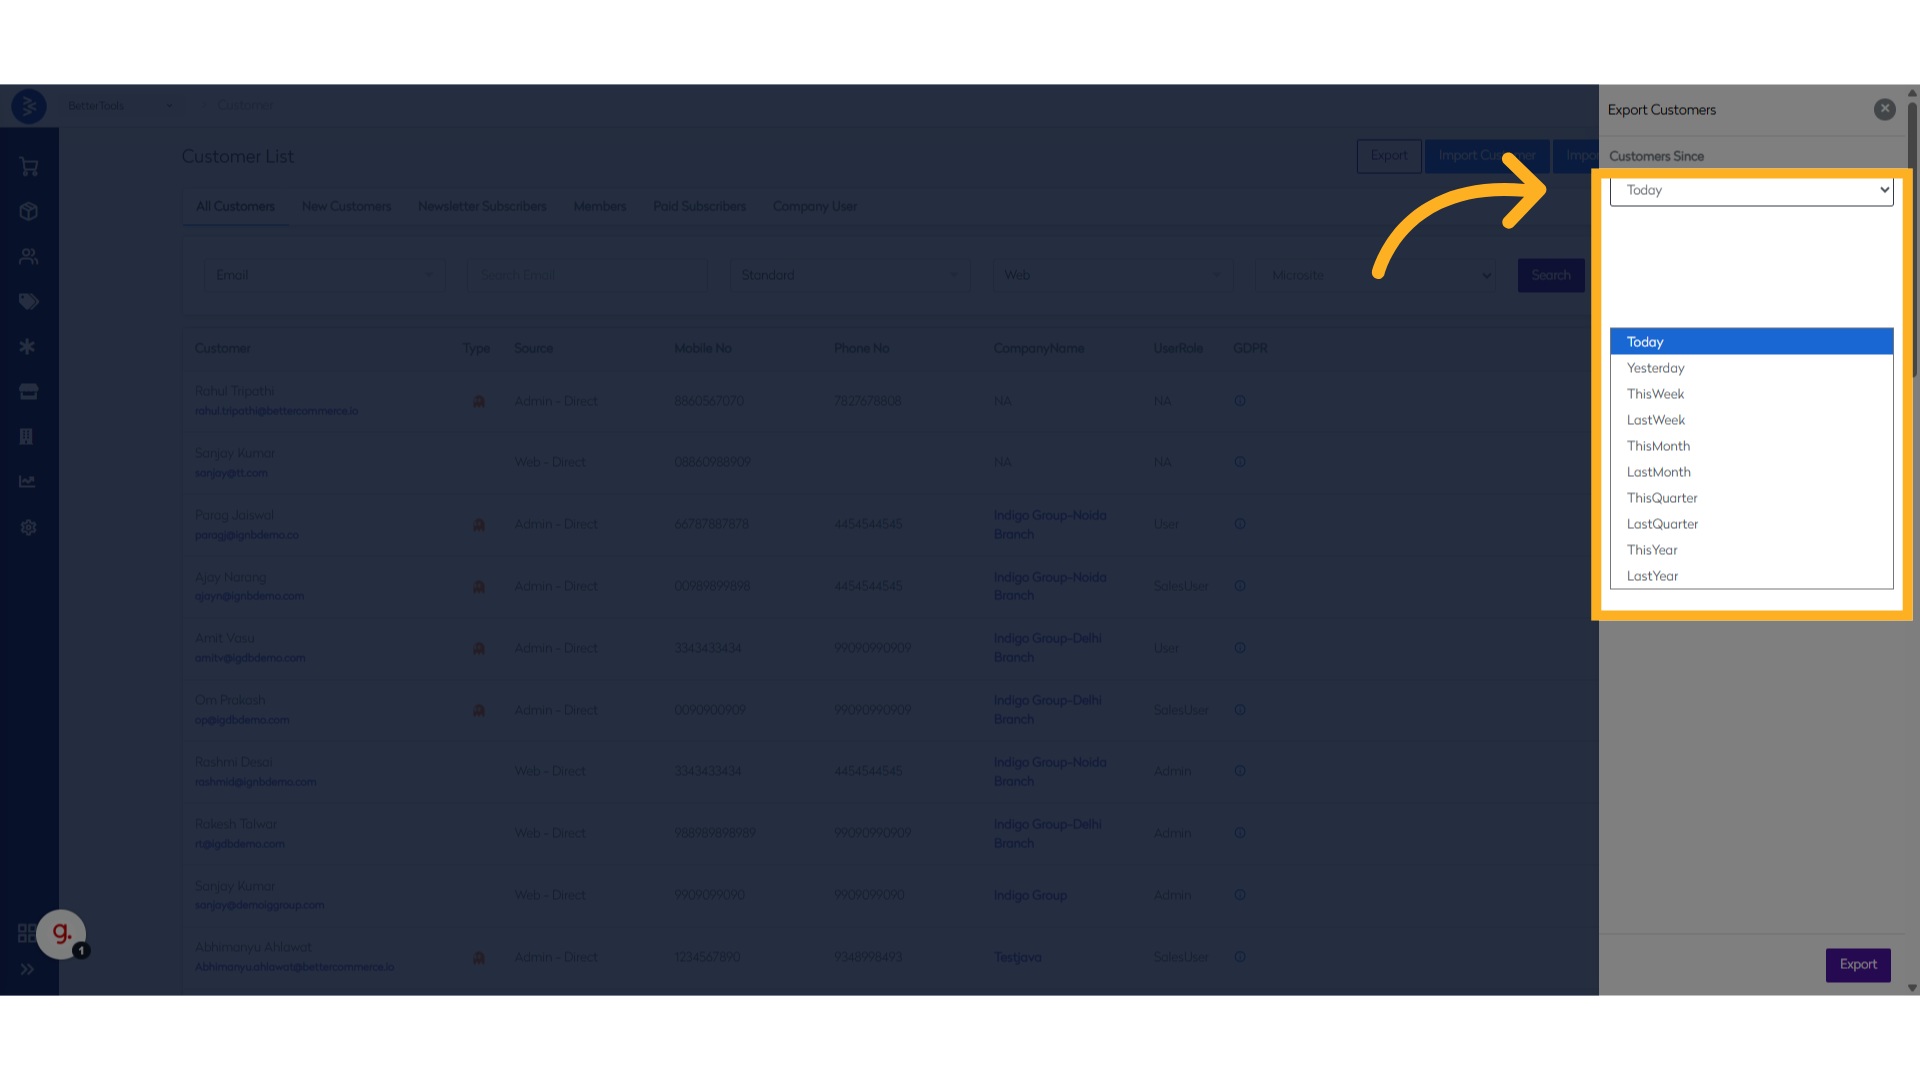
-
Choose the relevant filter from the predefined date range options such as Today, This Week, Last Month, This Month, or Last Year.
-
Click Export to initiate the data export process.
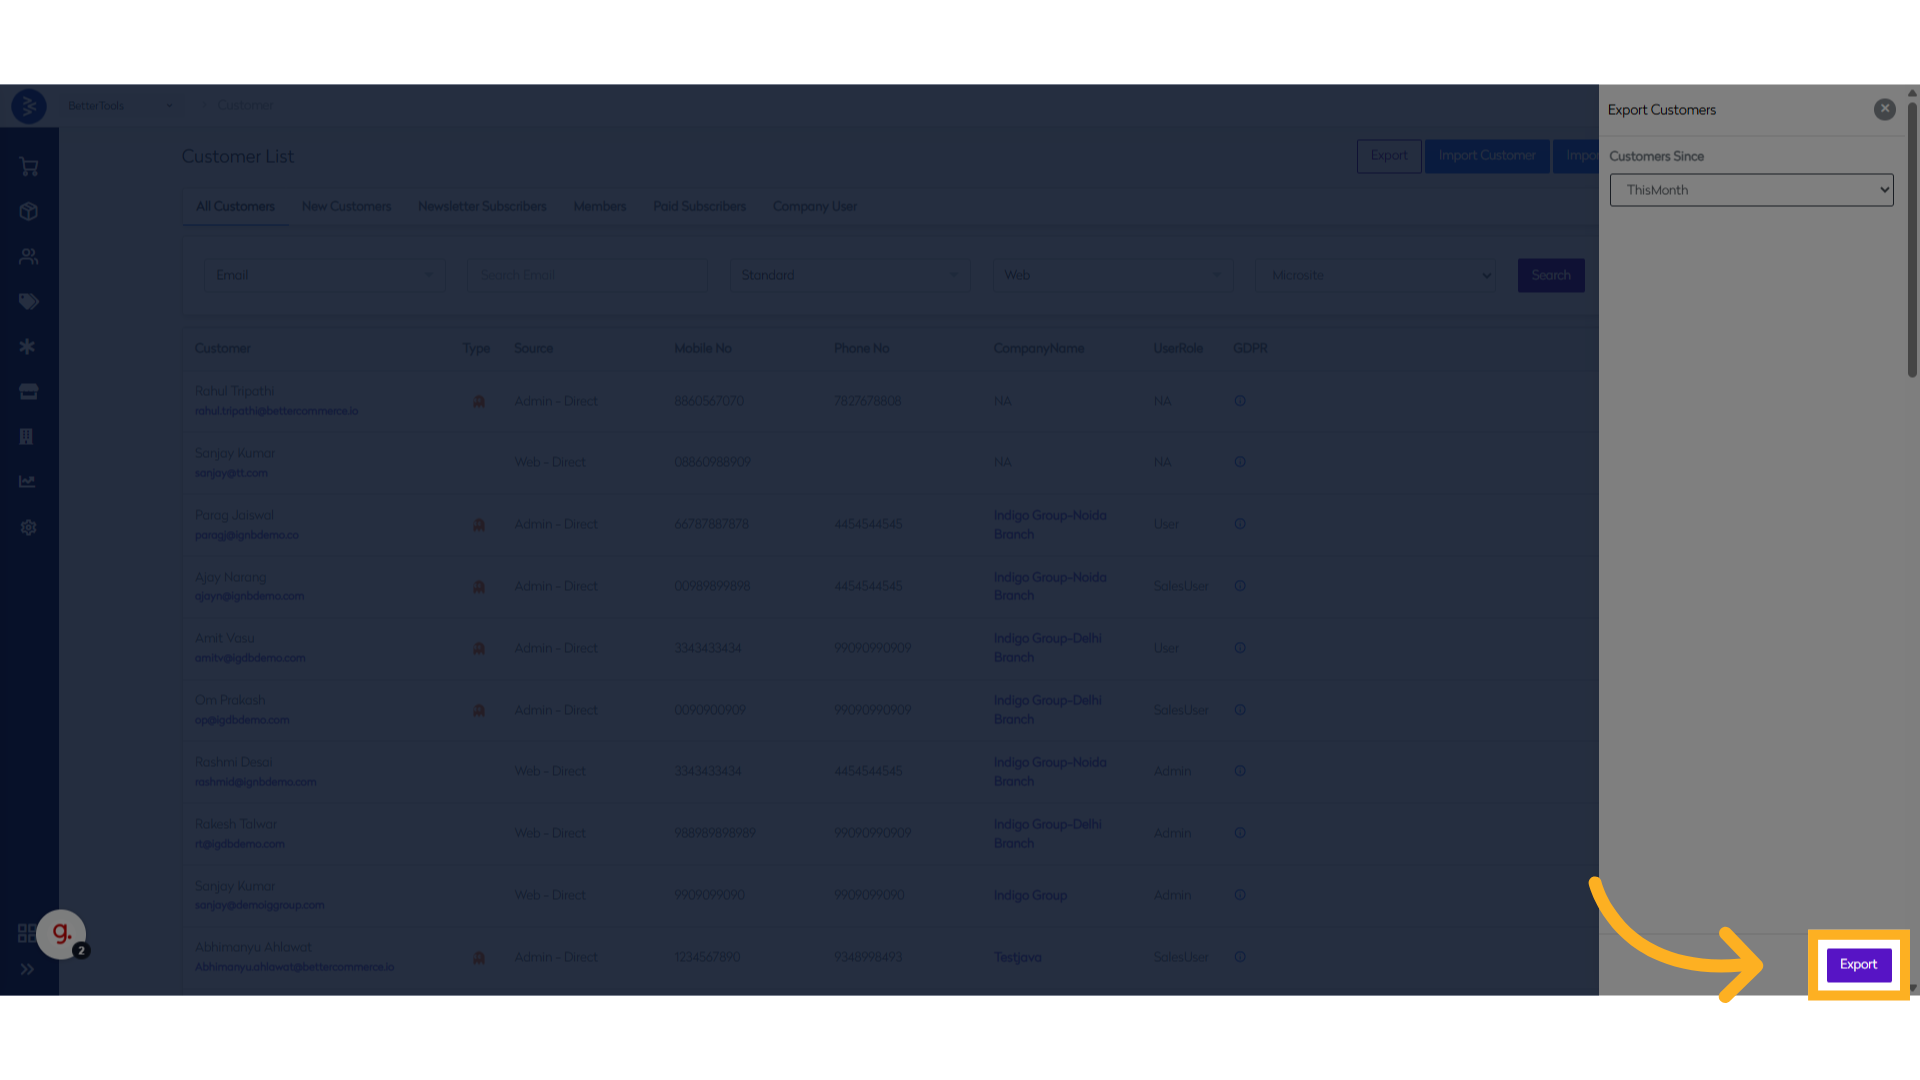
-
An email will be sent to the user with the export report attached.
Below are the fields available in the exported customer data file, along with their descriptions:
| Field Name | Description |
|---|---|
| FirstName | Customer’s first name |
| LastName | Customer’s last name |
| Primary email address associated with the customer | |
| PhoneNo | Contact number linked to the customer |
| SourceType | Indicates how the customer registered (e.g., Web, Mobile, Store, ThirdParty) |
| NotifyEmail | 1 if customer has opted in for email notifications, 0 otherwise |
| NotifySMS | 1 if customer has opted in for SMS alerts, 0 otherwise |
| NotifyPost | 1 if customer has opted in for postal communication, 0 otherwise |
| DateOfFirstPurchase | Date when the customer made their first purchase |
| DateOfLastPurchase | Date of the most recent purchase made by the customer |
| TotalOrderCount | Total number of orders placed by the customer |
| TotalItemsPurchased | Total number of items purchased across all orders |
| TotalOrderValue | Combined monetary value of all completed orders |
| TotalReturnCount | Number of orders or items returned by the customer |
| TotalReturnValue | Total value of returned items/orders |
Use the predefined date filters to quickly generate focused reports without manually entering custom date ranges.
Customer 360 Overview
Access a unified dashboard displaying each customer’s order history, interactions, and engagement metrics for comprehensive insights.
| Field Name | Description |
|---|---|
| Customer ID | Unique system-generated identifier for the customer |
| Primary email address used for account login and communications | |
| First Name | Customer's given name |
| Last Name | Customer's family name |
| Phone | Primary contact number & Telephone Number |
| Newsletter | Indicates if customer is subscribed to marketing emails (Yes/No) |
| Registered | Shows if customer has completed registration (Yes/No) |
| Group | Customer's assigned membership group (e.g., NewCustomers, Members) |
Order Statistics
| Field Name | Description |
|---|---|
| LTV (Life Time Value) | Total value of all customer orders to date |
| Total Orders | Number of orders placed by customer |
| AOV (Average Order Value) | Average value of customer's orders |
| LOV (Lowest Order Value) | Value of customer's smallest order |
| HOV (Highest Order Value) | Value of customer's largest order |
| Returns | Total value of customer's returned orders |
Sessions
| Field Name | Description |
|---|---|
| Page Views | Total number of pages viewed by the customer across the site. - Search: Number of times the customer used the site’s search functionality - Collection: Collection pages viewed by the customer Views - Product Views: Number of product detail pages viewed. |
| Added to Bag | Number of times added a product to the bag/basket. |
| Units Sold (All Channels) | Total quantity of products purchased by the customer across all sales channels. |
Activity Metrics
| Field Name | Description |
|---|---|
| Total Visits | Number of times customer has visited the store |
| Converted Visits | Number of visits that resulted in purchases |
| First Visit | Date of customer's first store visit |
| Last Visit | Date of customer's most recent store visit |
| First Ordered | Date of customer's first purchase |
| Last Ordered | Date of customer's most recent purchase |
Channel Information
| Field Name | Description |
|---|---|
| Web | Number of orders placed through website |
| Mobile | Number of orders placed through mobile app |
| Phone | Number of orders placed via telephone |
| Store | Number of in-store purchases |
Marketing Data
| Field Name | Description |
|---|---|
| Direct | Orders from direct traffic |
| Organic | Orders from organic search |
| Orders from email campaigns | |
| Social | Orders from social media |
| PPC | Orders from paid advertising |
Ghost Login Process
Ghost Login allows admin users or support agents to securely log in to the storefront as a specific customer directly from the CommerceHub. This functionality enables internal users to replicate customer experiences, troubleshoot issues, or complete transactions on behalf of the customer — without needing access to the customer’s credentials. Post login it the session behaves identically to a real customer login, reflecting their personal data, preferences, and cart state.
Ghost Login is useful while:
- Troubleshooting customer issues by replicating their exact storefront view
- Completing transactions on behalf of customers (e.g., phone support or chat orders)
- Testing promotions or pricing rules with customer-specific conditions
- Managing subscriptions, wishlists, or saved baskets directly from the frontend
- Reproducing bugs that only affect specific users
- Secure access without disclosing customer login credentials
How to login on storefront using ghost login
Follow the steps below to log in as a customer using the Ghost Login feature from the CommerceHub Dashboard:
-
From the CommerceHub Dashboard, navigate to
Customer > Viewto open the customer listing page.
-
Use the search bar to find the customer by Phone Number, Name, Email, or other identifiers. Click Search to filter the results and click on the customer's name to open their Customer Details page.
-
On the top-left of the page, click Login as this User.
-
A new browser tab will open, automatically logging you into the storefront as the selected customer.
This session mirrors the customer's actual login and allows full access to their storefront experience.
Managing Customer Groups
Customer Groups in CommerceHub allow businesses to organize customers into segments based on shared characteristics or purposes. These groups can be used to show promotions or shipping methods tailored to each group.
Creating a Customer Group
Follow the steps below to create a new customer group in CommerceHub:
-
Navigate to
Customers > Customer Groupsfrom the CommerceHub Dashboard.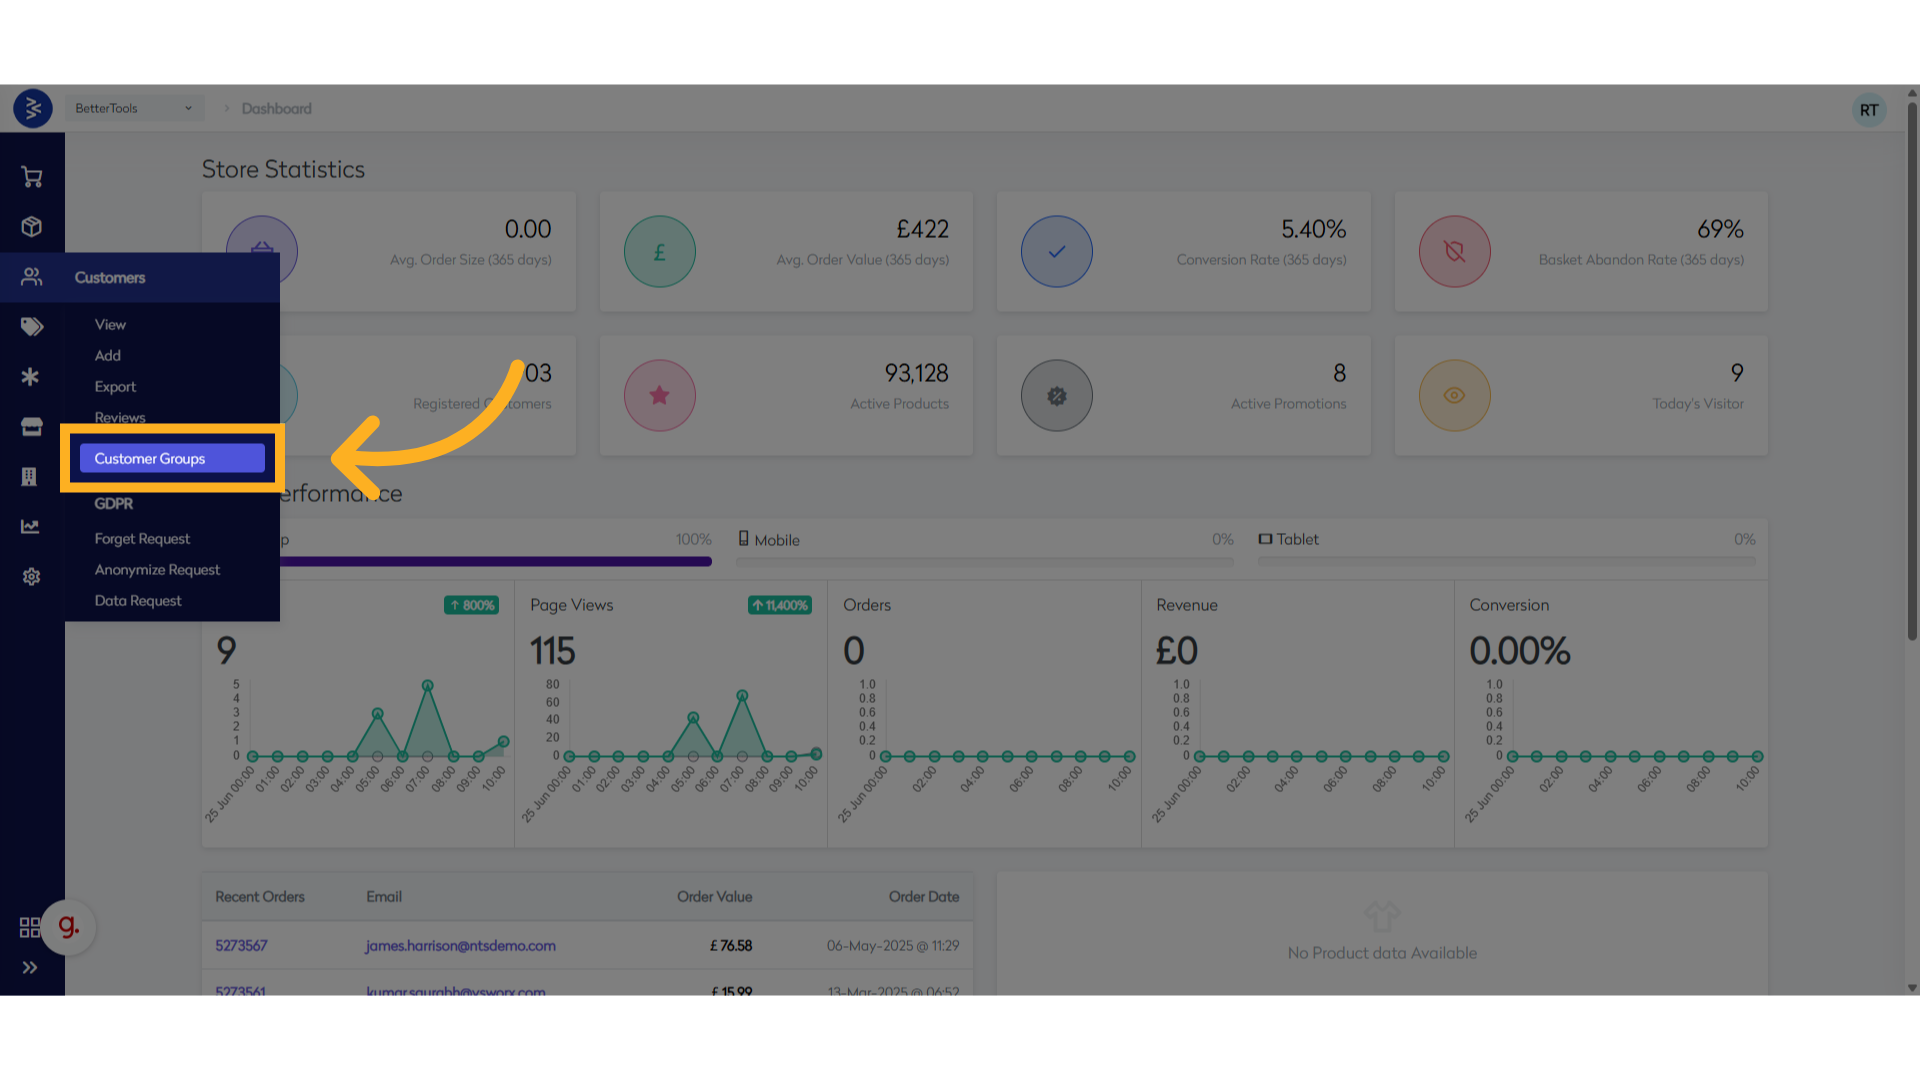
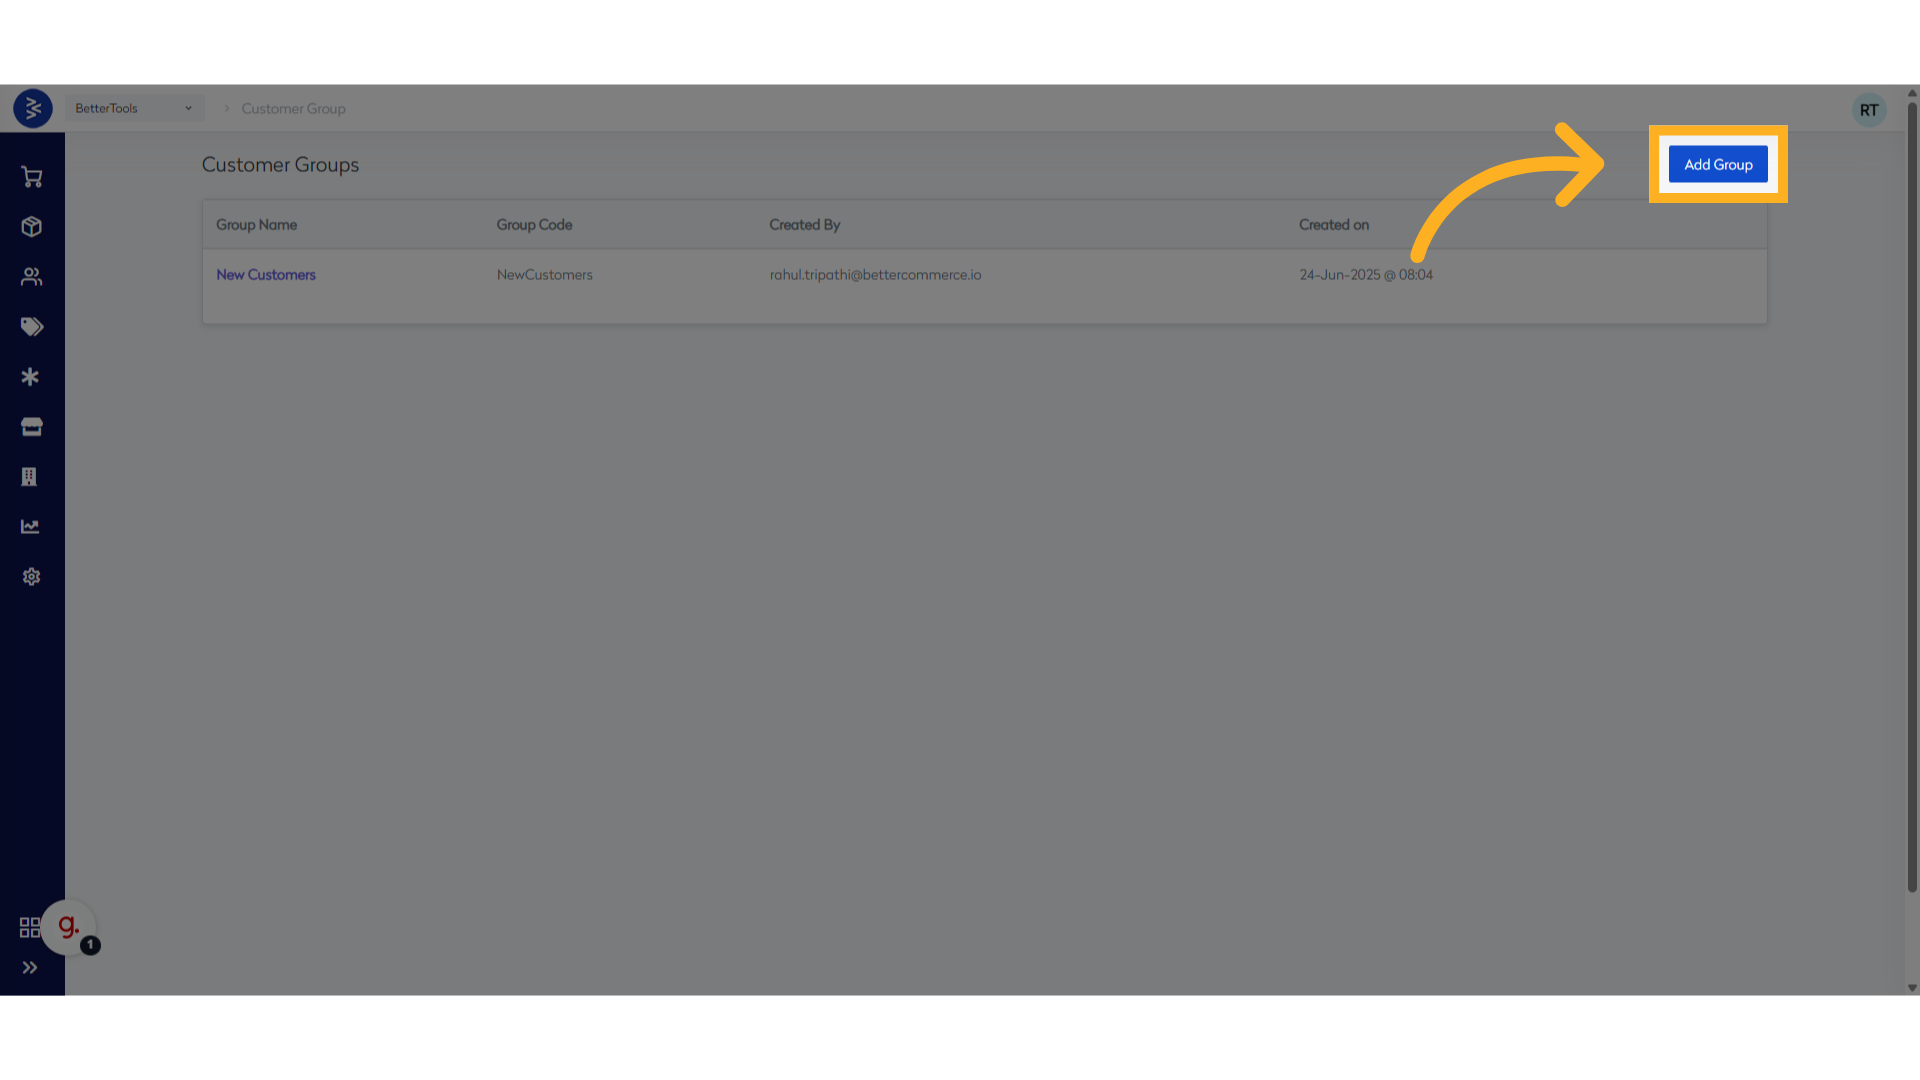
-
Click Add Group to initiate the creation of a new customer group.
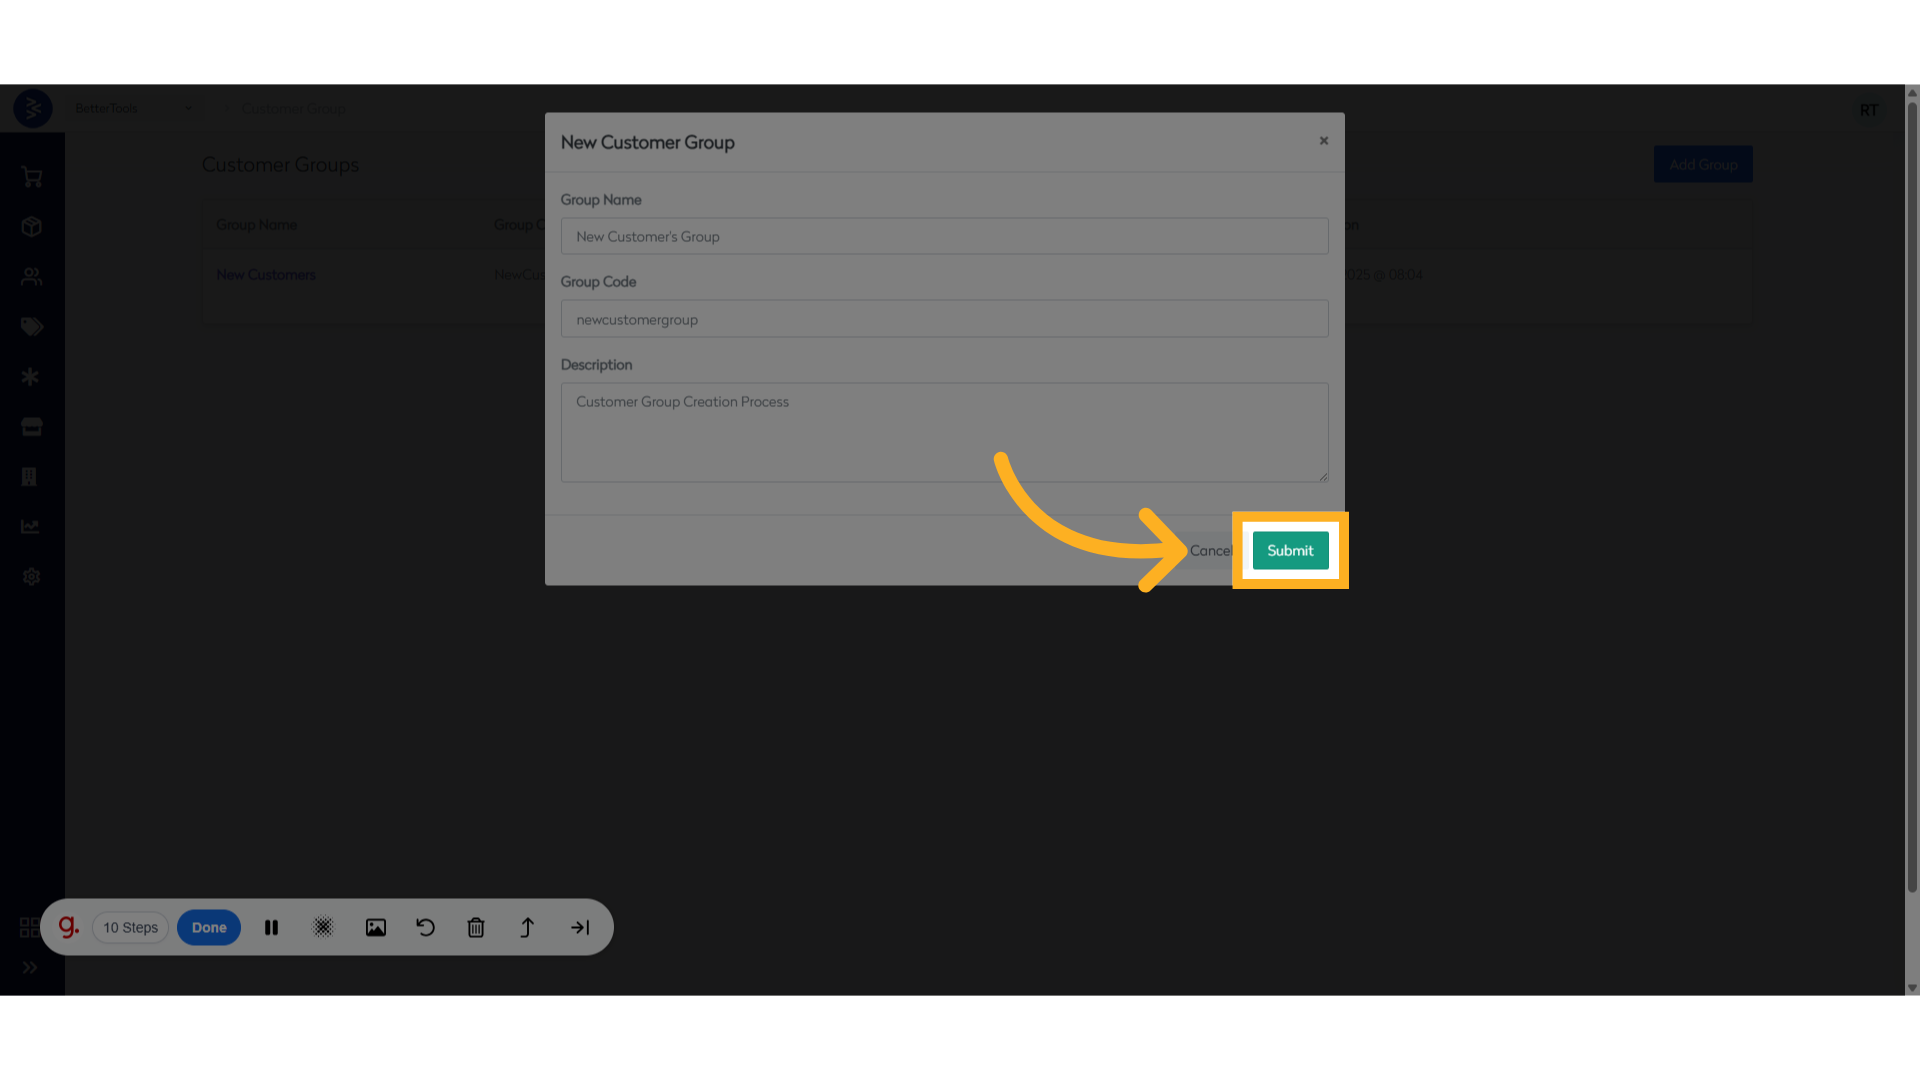
-
Enter the following details:
- Group Name – The display name for the customer group
- Group Code – A unique identifier for internal reference
- Description – Optional field to describe the purpose or characteristics of the group

- Click Submit to save the new customer group.
The newly created group will now be available for assigning to customers and applying group-specific rules.
Managing Customers in a Customer Group
How to Add Customers to a Customer Group
-
Navigate to
Customer > Customer Groupsand click Edit next to the desired group.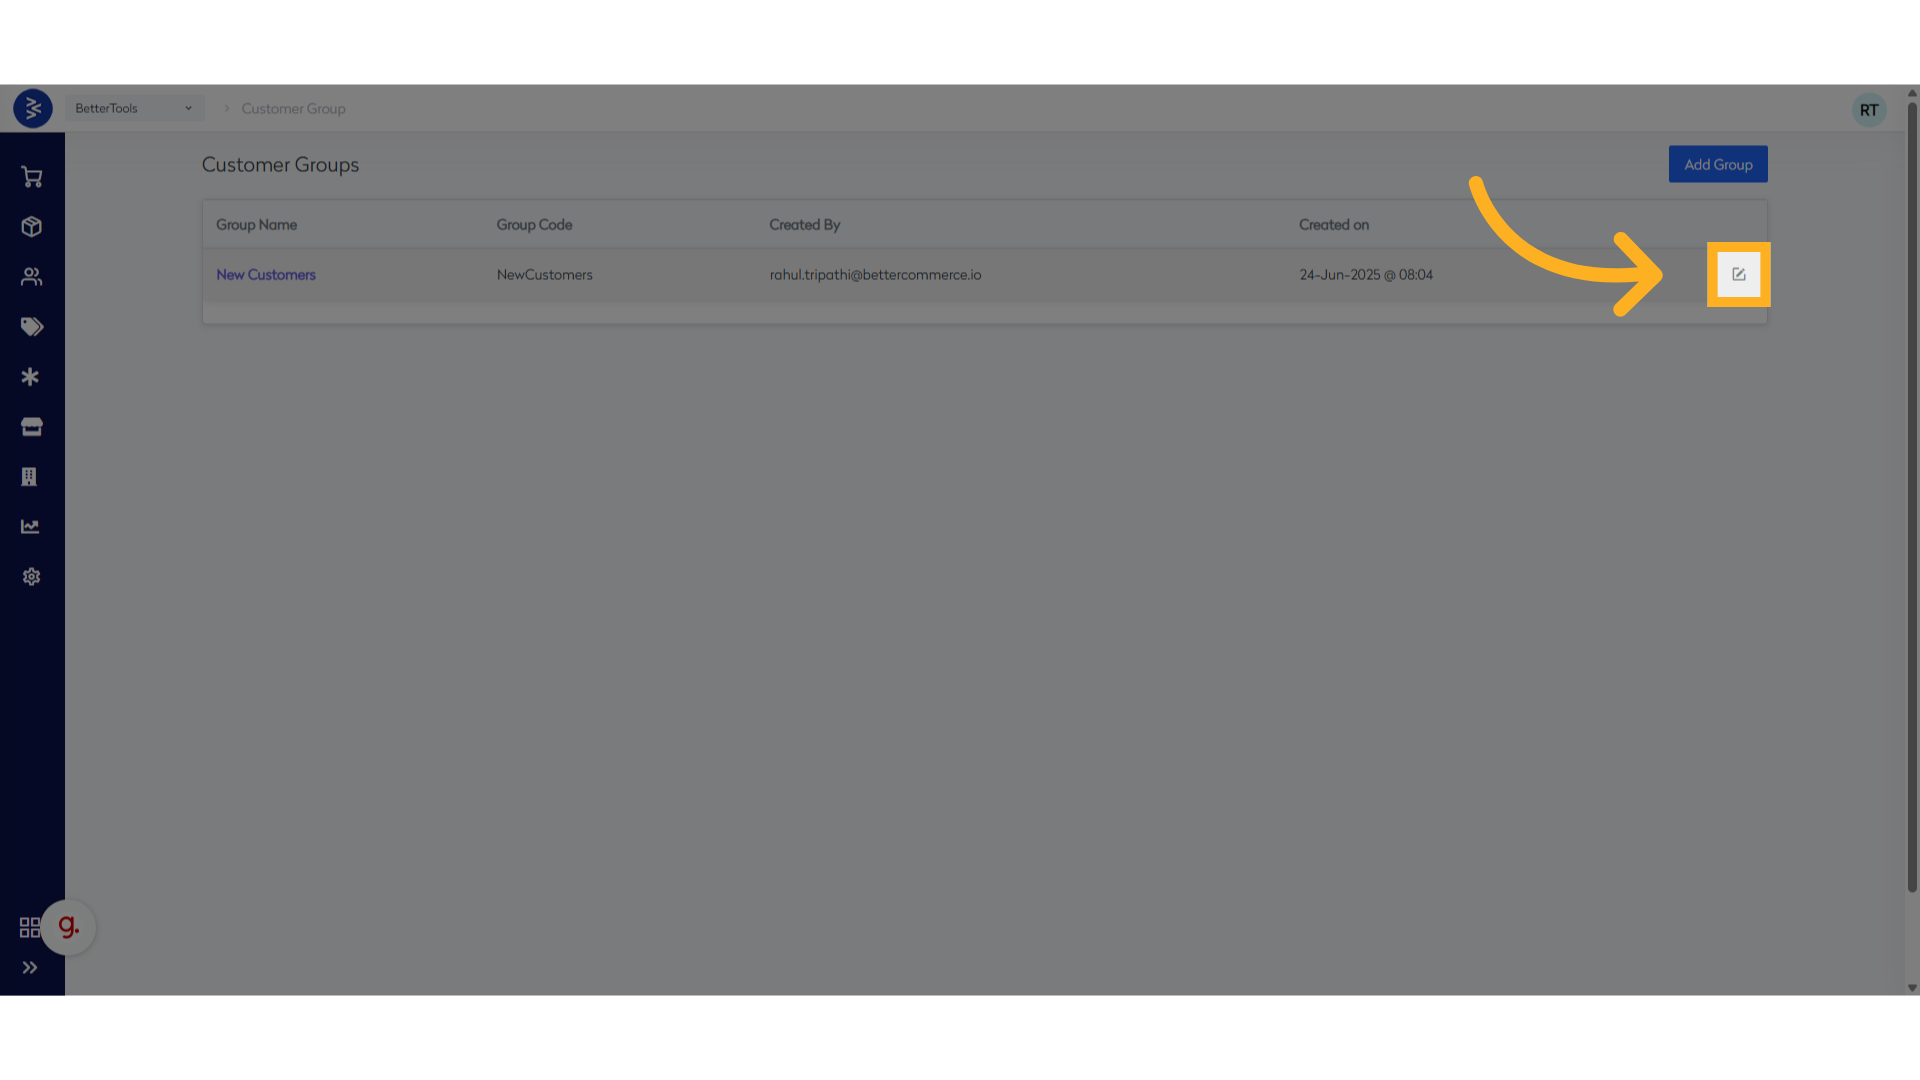
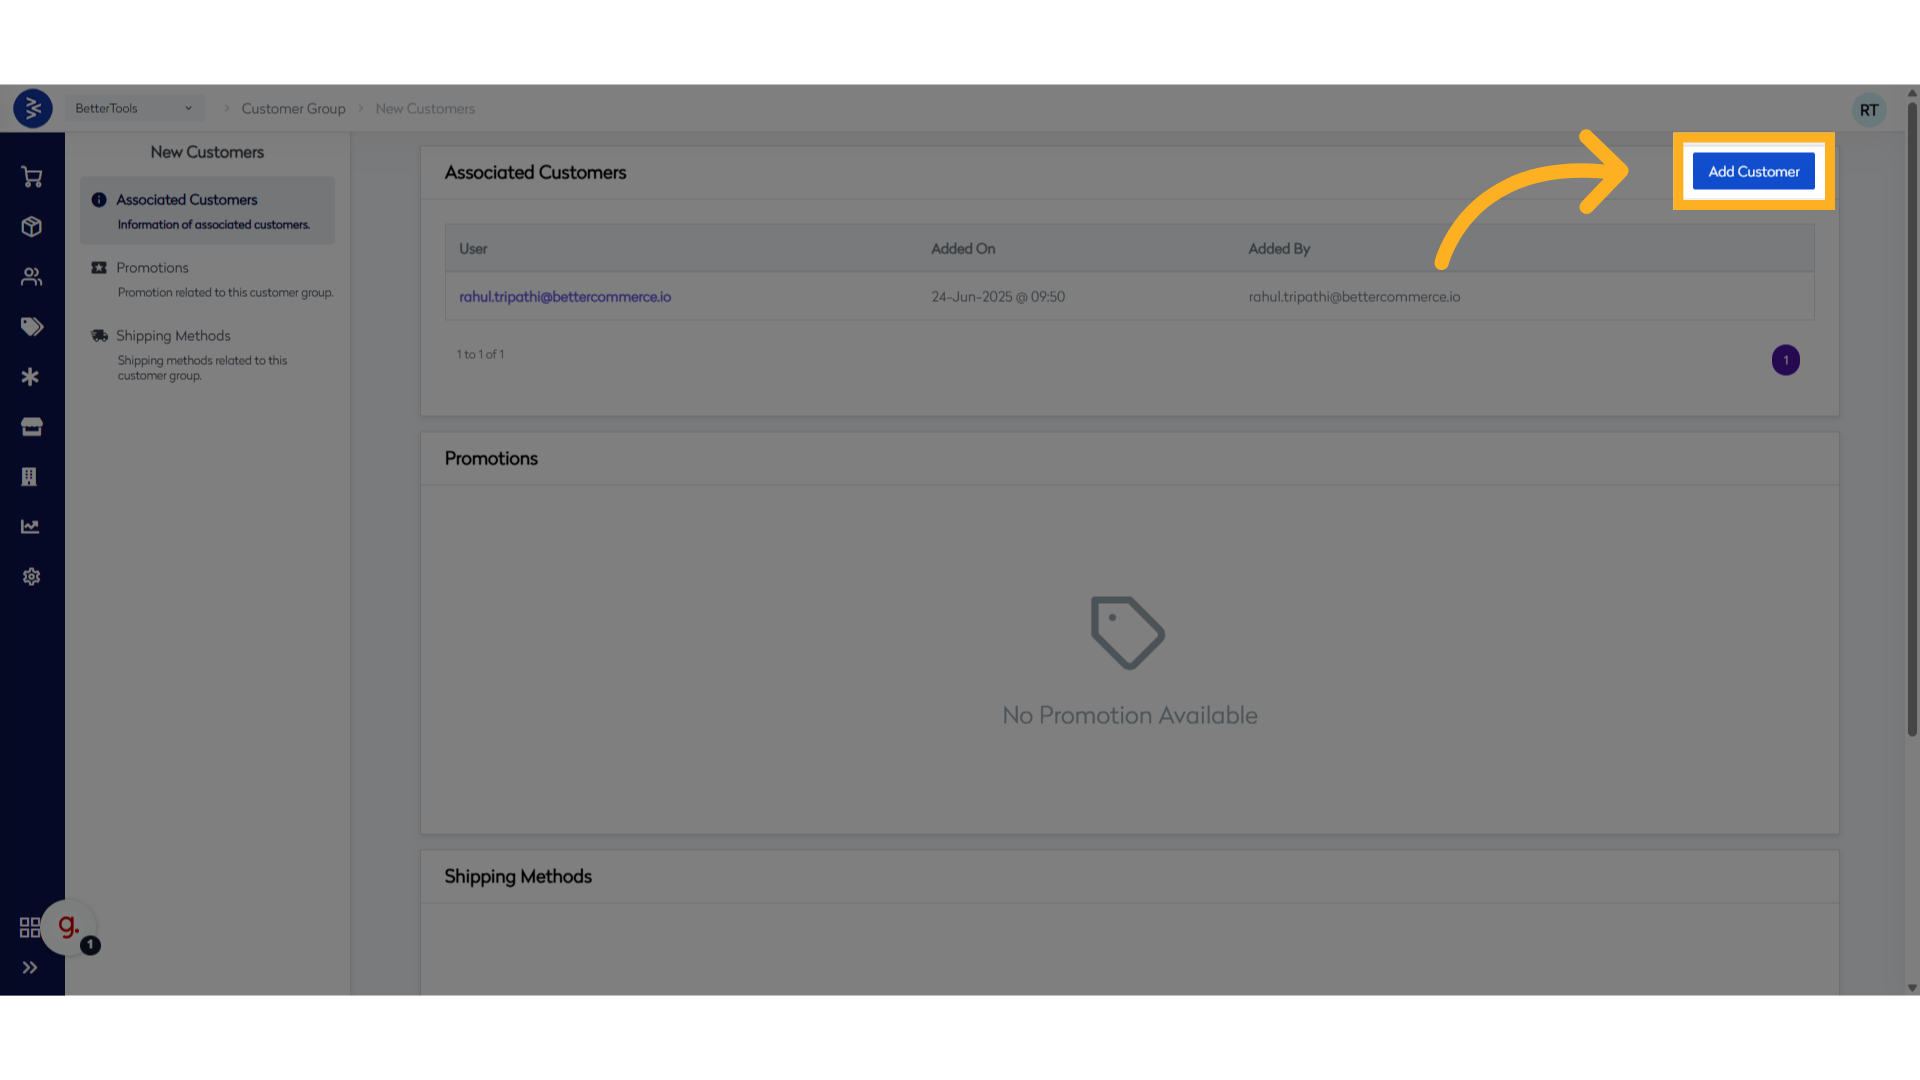
-
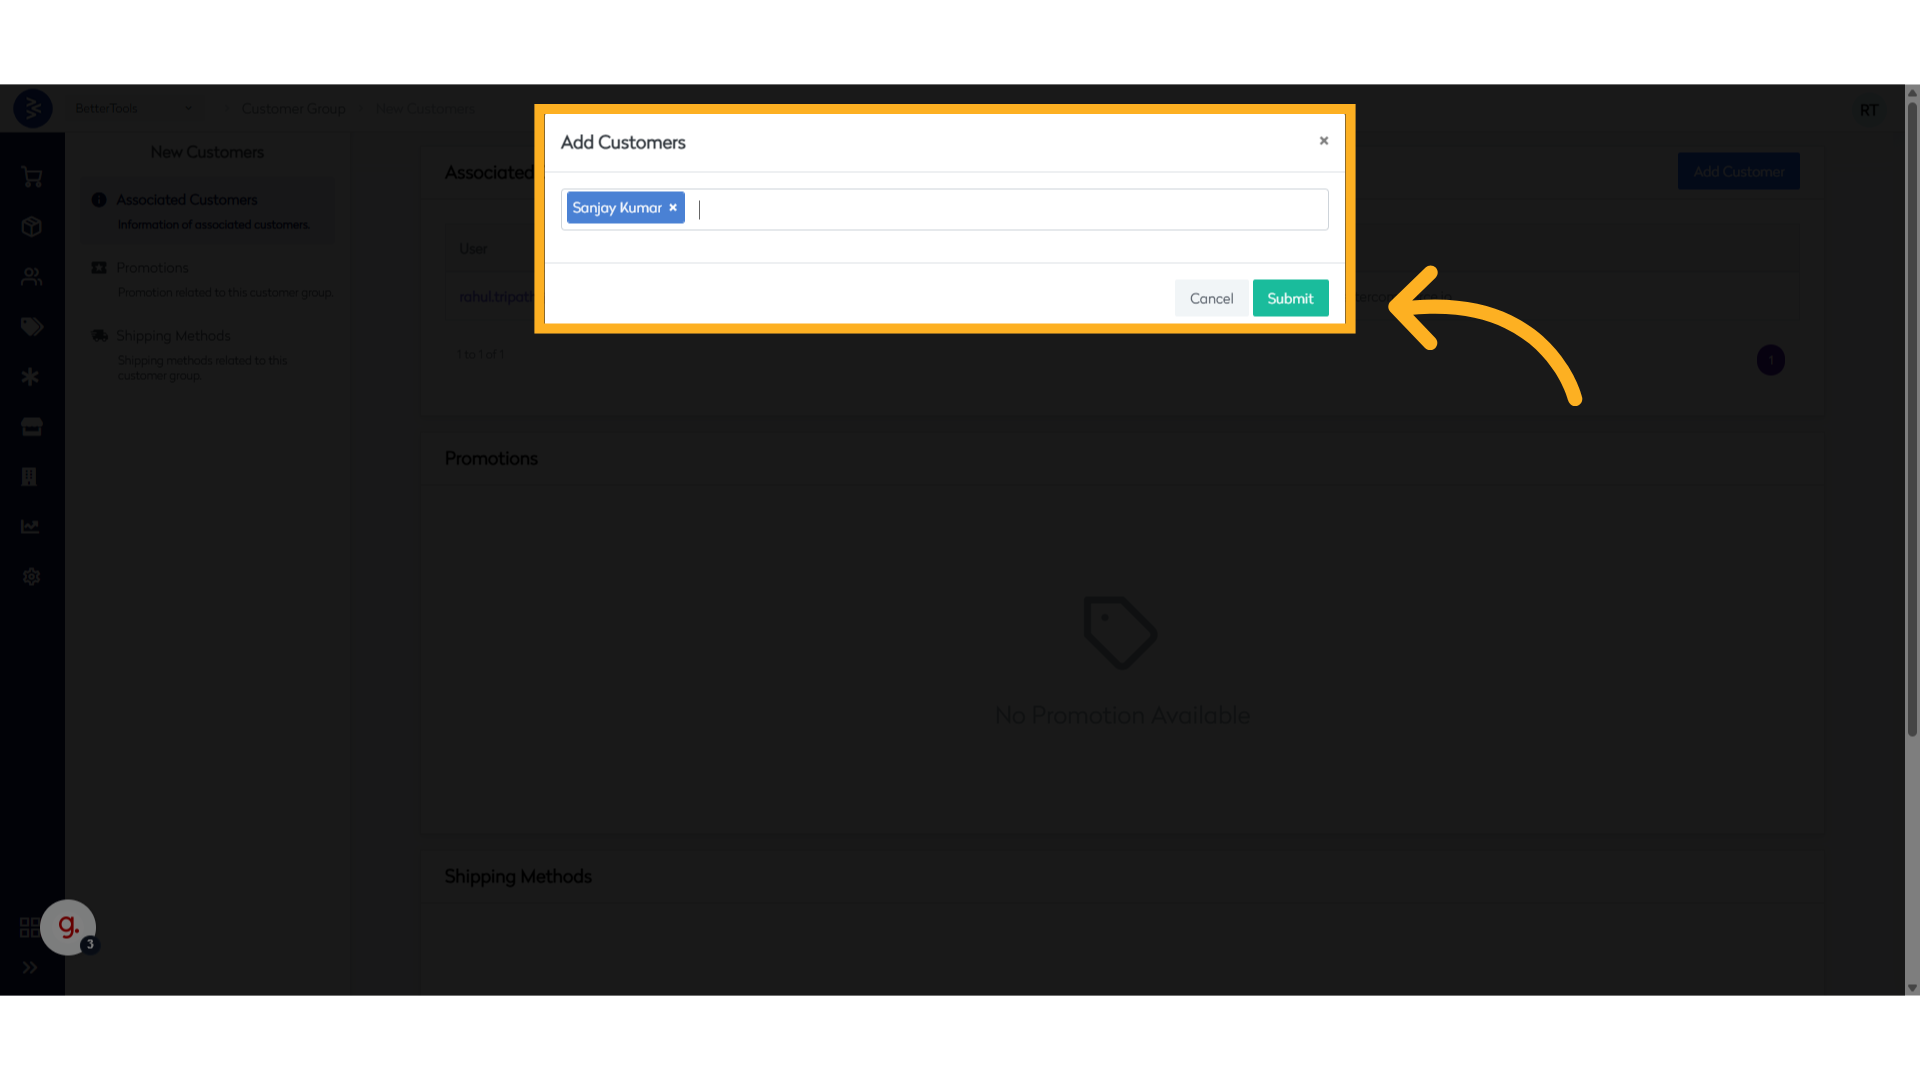
In the Customer Group Details page, click Add Customer.
-
Enter the email or name of the customer in the search box. Select the user from the list click Submit to add them to the group.
How to Remove Customers from a Customer Group
-
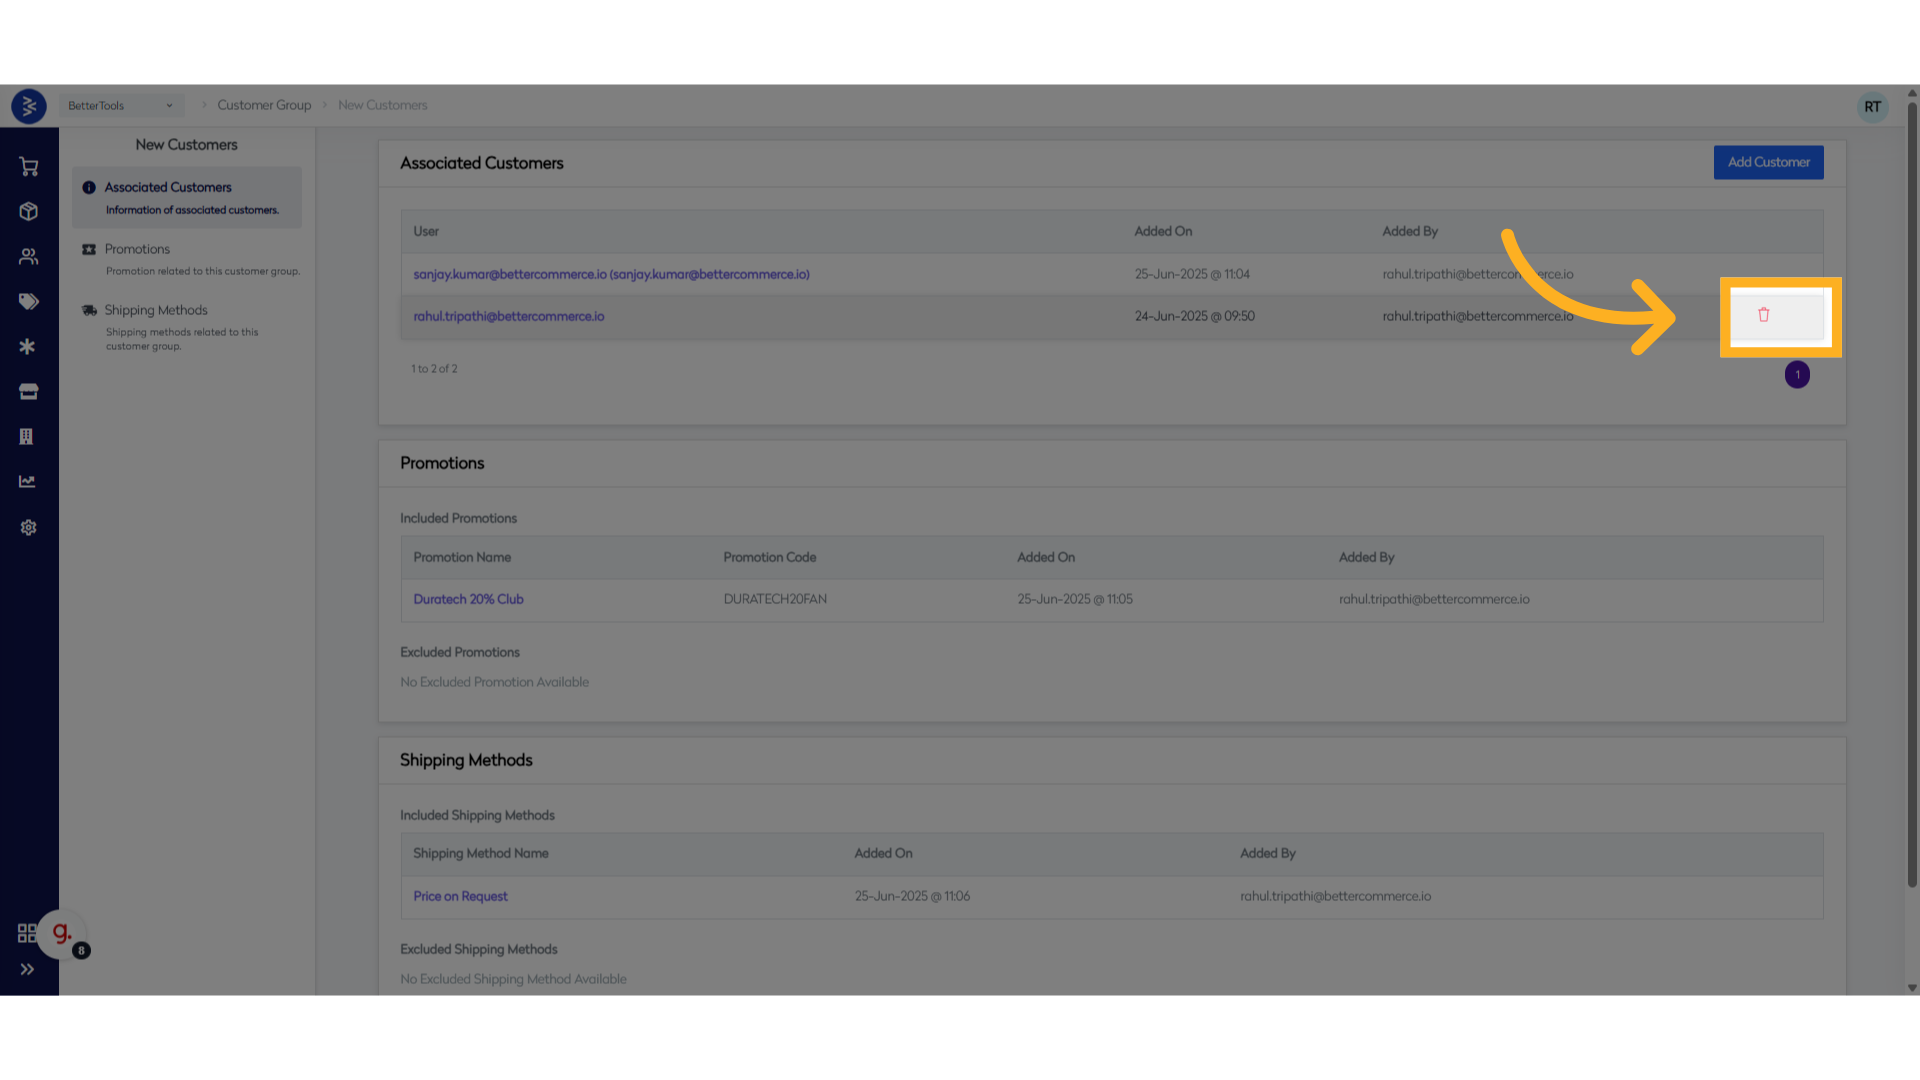
From the Customer Group Details page, go to the Associated Customers section.
-
Click the bin icon next to the customer you want to remove.
-
A confirmation message will appear and click Confirm to remove the customer from the group.
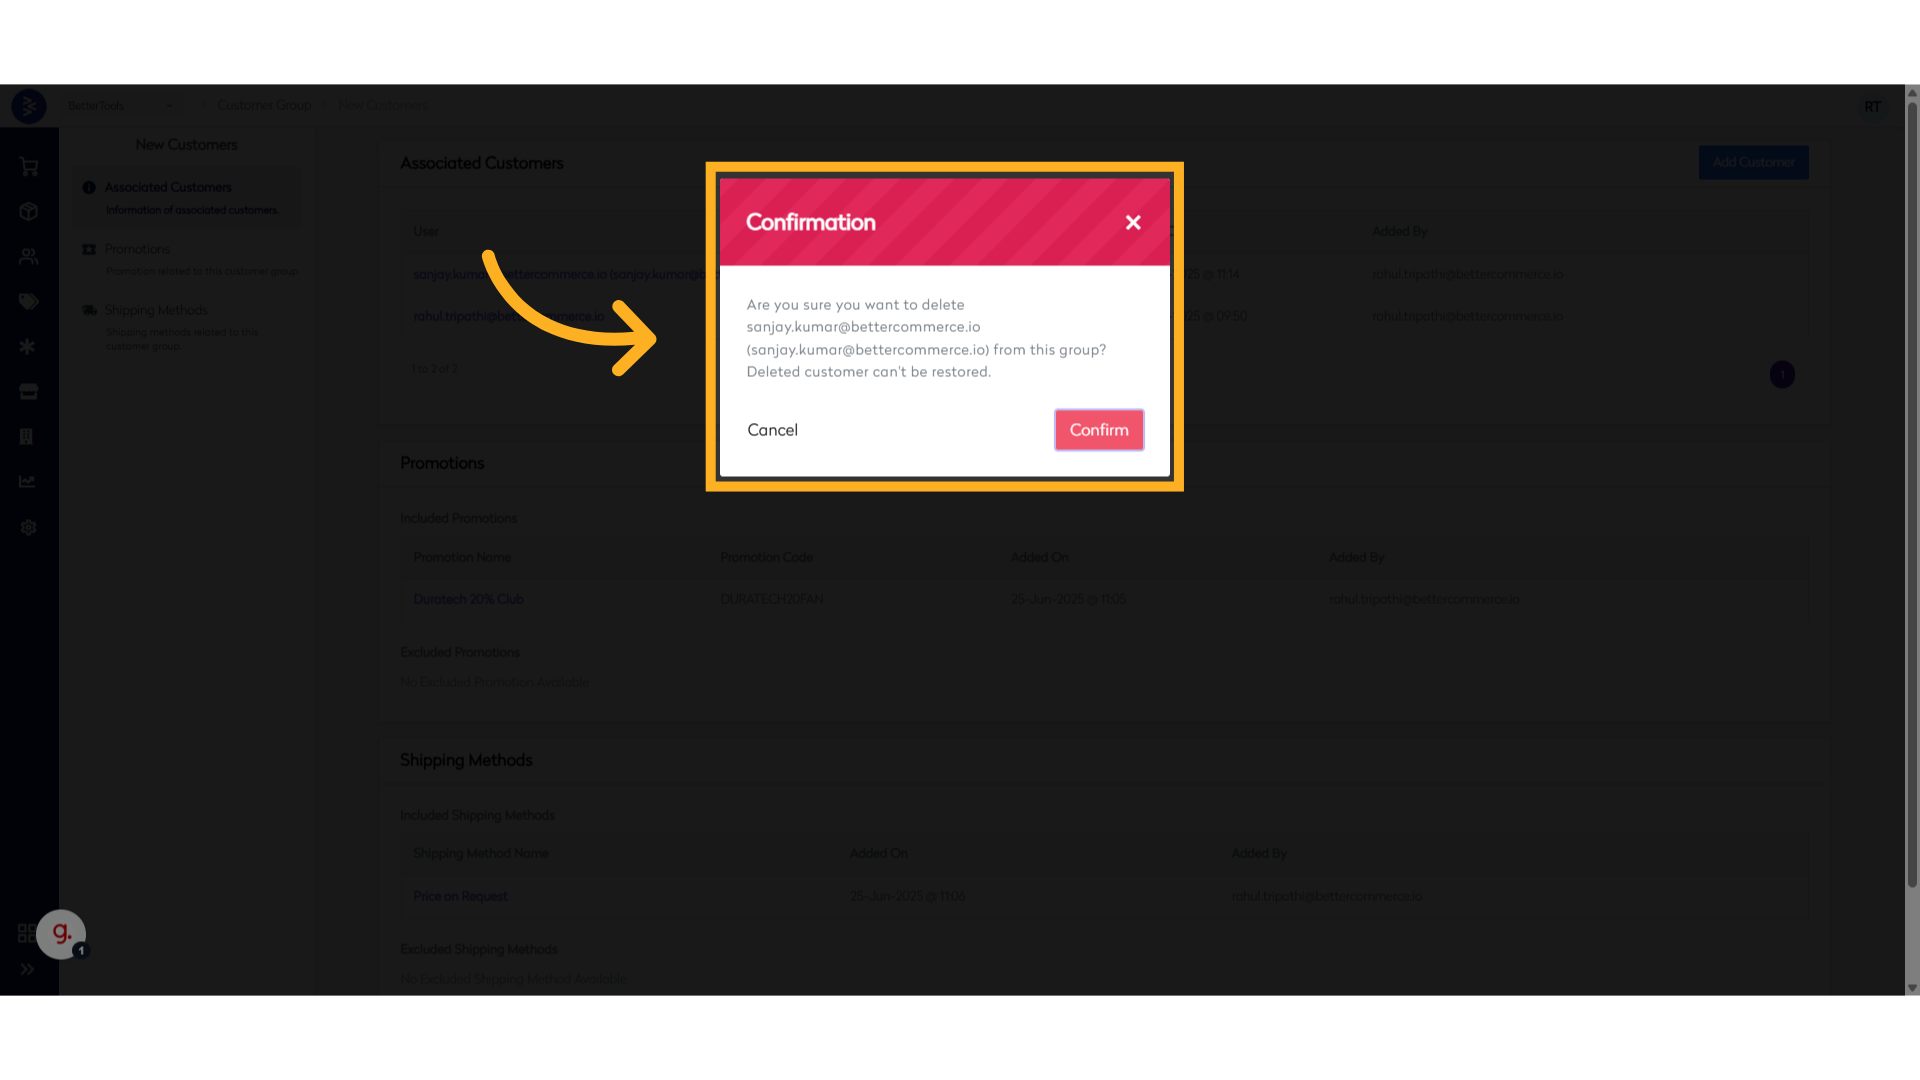
Once removed, the customer will no longer be part of the group and any group-specific rules or pricing will no longer apply to them.
GDPR Requests and Compliance
The GDPR section in the Customer Details page allows administrators to manage a user's communication preferences. This ensures compliance with data protection regulations by giving control over how customers are contacted.
How to Manage GDPR Preferences
-
Navigate to the Customer Details page from the customer listing view.
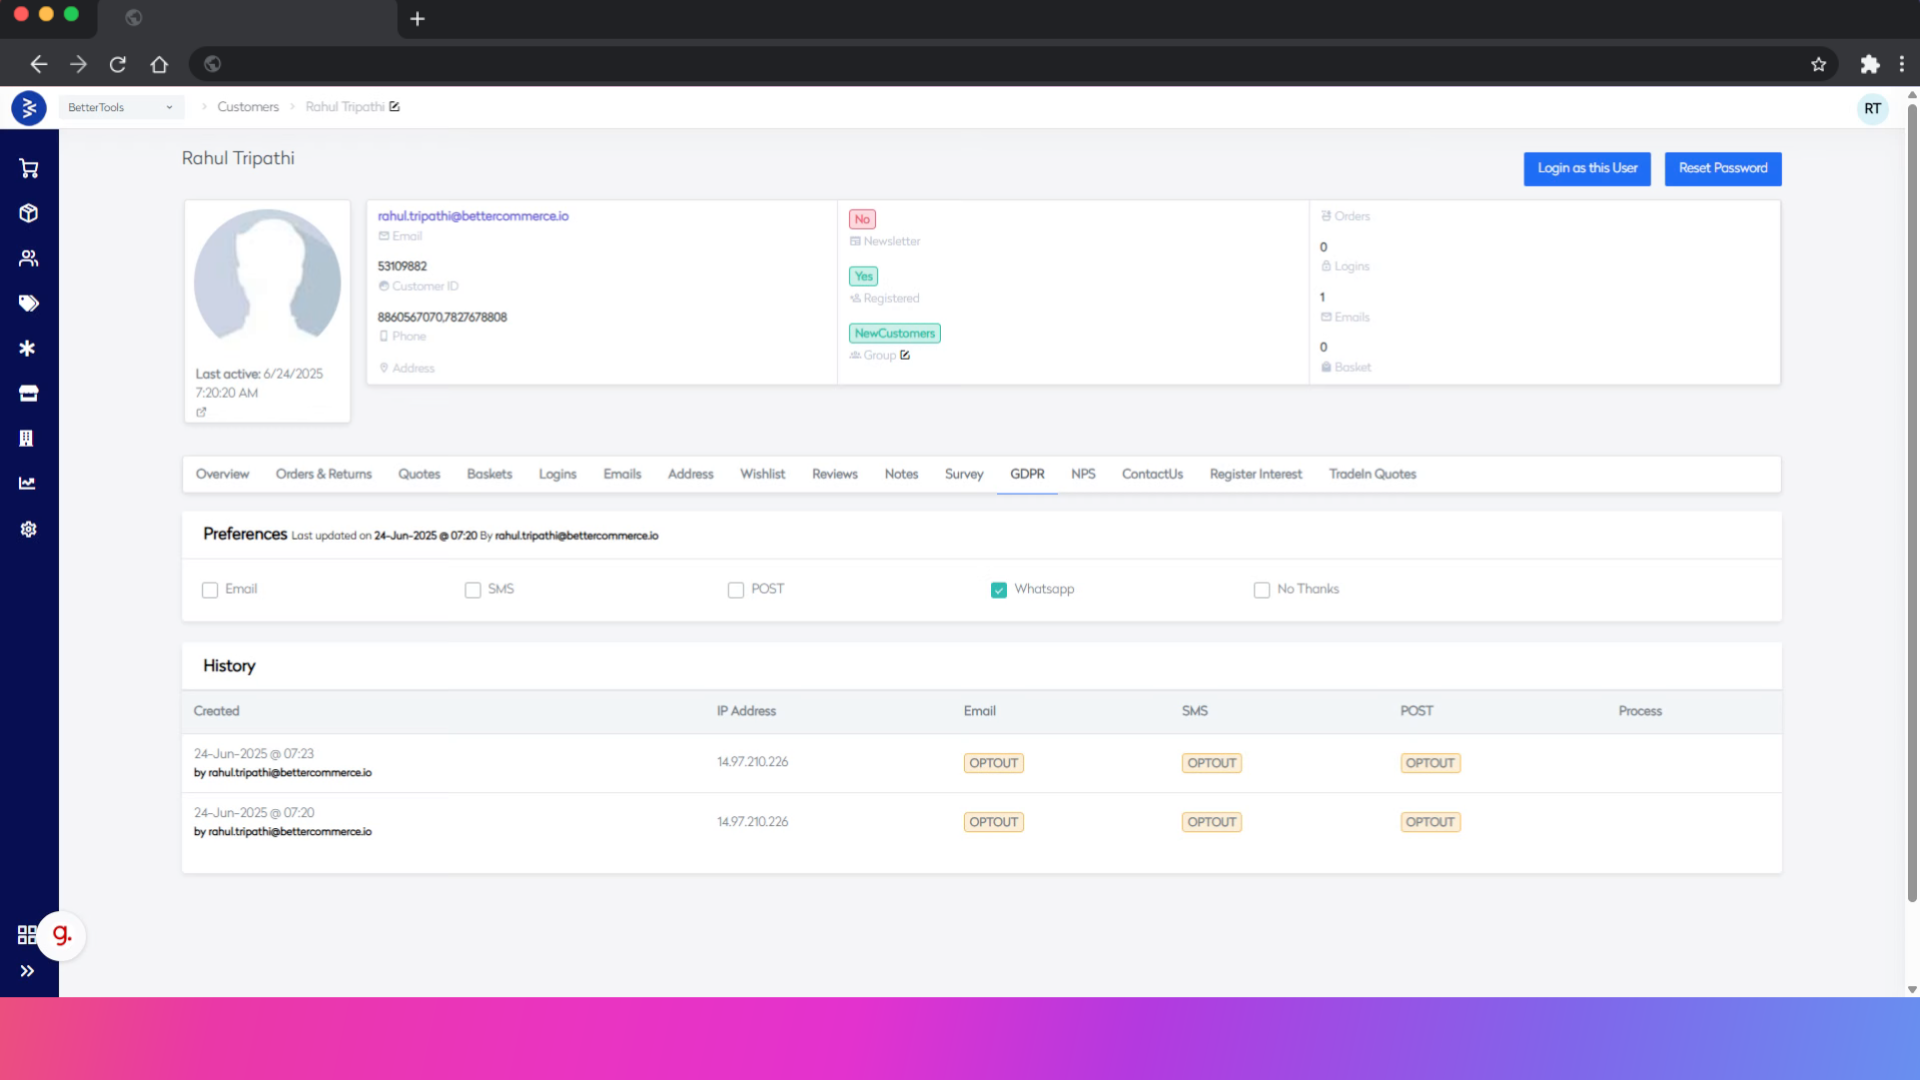
-
Click the GDPR tab, select or unselect the user's communication preferences as required (e.g., email marketing, SMS alerts, newsletters).

All changes are saved in real time and reflect the customer’s current consent status.